Pie crust was one of the first things I was taught to make, and I have always used my mom’s recipe – 3 cups flour to 1 cup butter, with 1 TBLS sugar per cup of flour for a sweet, double crust pie. And I tended to use unsalted butter, which makes a good tasting, but not flaky crust. For flakes you need shortening or lard. Recently I’ve been playing around with both the proportions, and the type of fat – mom used salted margarine – and I have decided that I like the original proportions, but with salted butter, plus two TBLS vegetable shortening or lard.
3 cups flour (unbleached white or whole wheat, or a combo)
good pinch salt, unless you’re using salted butter
3 tablespoons sugar
1 cup butter, either salted or un- (2 sticks, 16 tablespoons)
2 tablespoons vegetable shortening or lard
5-7 tablespoons cold water
Measure the flour, salt and sugar into the bowl of your stand mixer (my favorite method), your food processor, or a mixing bowl. Slice the butter and shortening over the top and combine with the flour mixture, using the paddle attachment of the mixer, by pulsing the processor, or using a pastry blender, 2 knives, or your fingers, until you have a crumbly mixture with no butter lumps bigger than currants. With the mixer or processor running, or while stirring with fork, drizzle in the water by tablespoons, until the mixture just starts to come together in clumps. Stop before you have one big ball. Turn the crust out onto a floured surface and knead lightly to bring it together. Gather it into a ball, flatten into a disk, wrap (in plastic, wax paper, one of your reusable snack/sandwich bags), and chill for about an hour, and up to 2 days.
This makes enough crust for 2 single crust pies or one double crust or lattice topped pie.
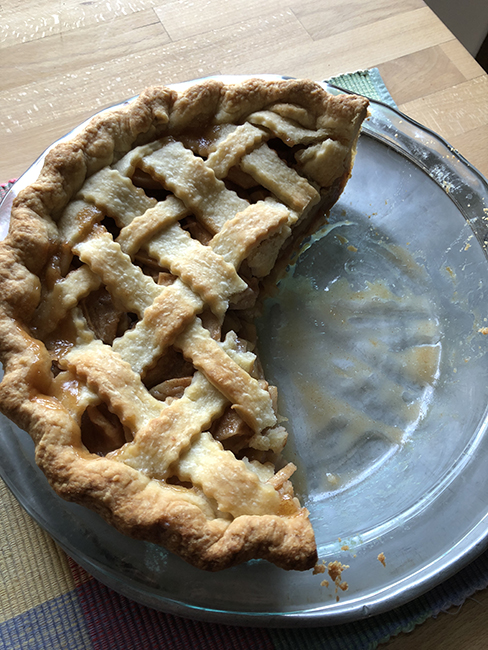
For a lattice crust, roll out the bottom crust and ease it into the pie dish. Set the crust in the fridge. Make the filling. Roll out the top crust and cut it into strips – with a decorative cutter if you have one – the one I use is actually for making the ruffled edges of lasagna noodles. Pour the filling into the bottom crust – it helps to take it out of the fridge at this point. Weave the crust strips into a lattice – use what you remember from making woven potholders for your mom.
See pictures below.
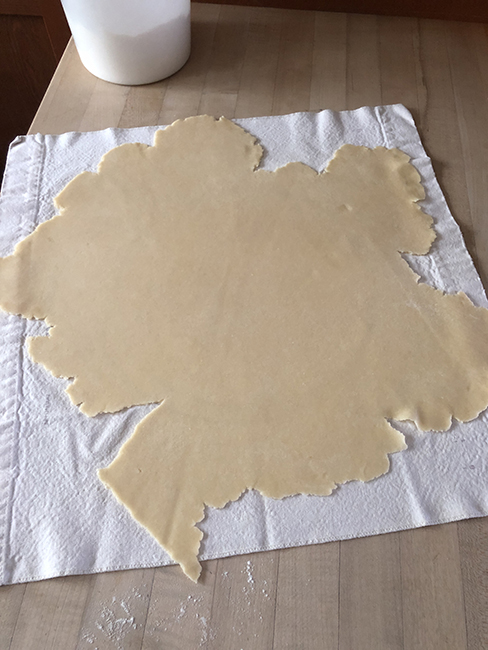
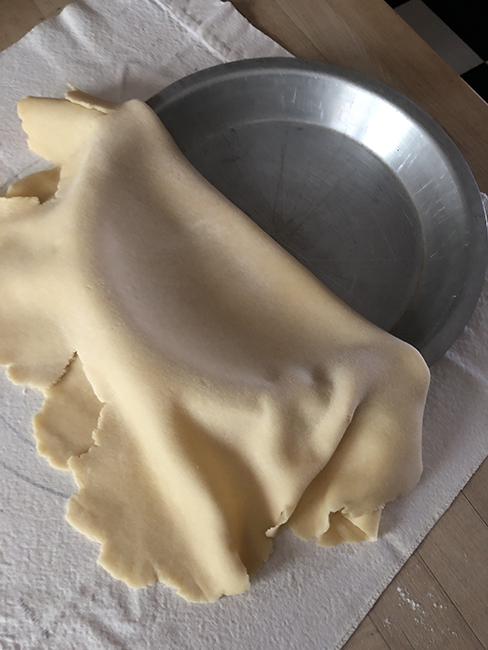
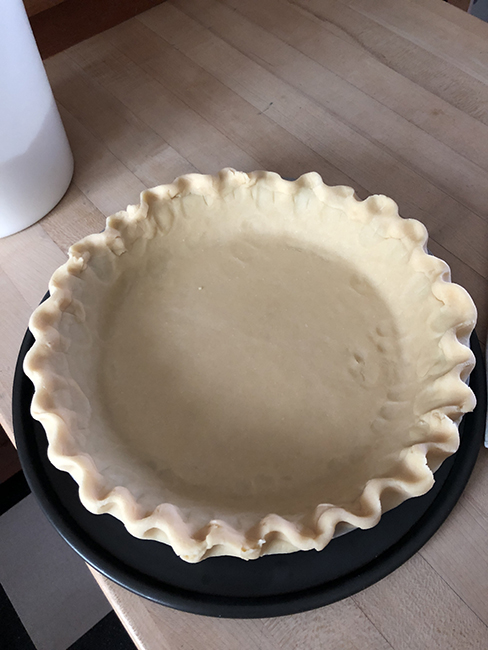
Lattice apple pieRolled out piecrustFlop the pie crust in half and place it in the pan. Unfold and gently fit into the pie dishCrimp the edges – this pattern was made with 2 fingers and a thumb – you can also crimp the edge with a fork. Place the crust in the fridge or freezer while you make the filling
Crust:
2 cups unbleached white flour
2 tablespoons sugar
a few pinches of salt (if you use unsalted butter)
9 tablespoons dairy OR vegan butter
3 tablespoons vegetable shortening
7-8 tablespoons cold water
Topping
1 1/2 cups flour
1 teaspoon baking powder
3 tablespoons sugar
3 tablespoons light brown sugar
1 teaspoon cinnamon
A few grates of nutmeg
About 1 teaspoon finely grated lemon zest lemon
1/4 pound (1 stick or 4 ounces) unsalted butter, OR vegan butter, melted
pinch of salt – or use salted butter
Filling:
3 pounds of apples, peeled, cored, and sliced
2-3 tablespoons lemon juice from the lemon you zested for the topping
1/3 to 1/2 cup sugar, depending on the sweetness of the apples
3 tablespoons cornstarch
2 tablespoons flour
Make the crust: measure the flour, salt and sugar into the bowl of your stand mixer (my favorite method), your food processor, or a mixing bowl. Slice the butter and shortening over the top and combine with the flour mixture, using the paddle attachment of the mixer, by pulsing the processor, or using a pastry blender, 2 knives or your fingers, until you have a crumbly mixture with no butter lumps bigger than currants. With the mixer or processor running, or while stirring with fork, drizzle in the water by tablespoons, until the mixture just starts to come together in clumps. Stop before you have one big ball. Turn the crust out onto a floured surface and knead lightly to bring it together. Gather it into a ball, flatten into a disk, wrap (in plastic, wax paper, one of your reusable snack/sandwich bags), and chill for about 30 minutes, and up to 2 days.
When you are ready to bake, heat oven to 375°F.
Make topping: Combine the flour, baking powder, sugars, and lemon zest in a bowl. Stir in the melted butter with a fork until you have formed small and large clumps. Refrigerate or set in the freezer while you make the filling.
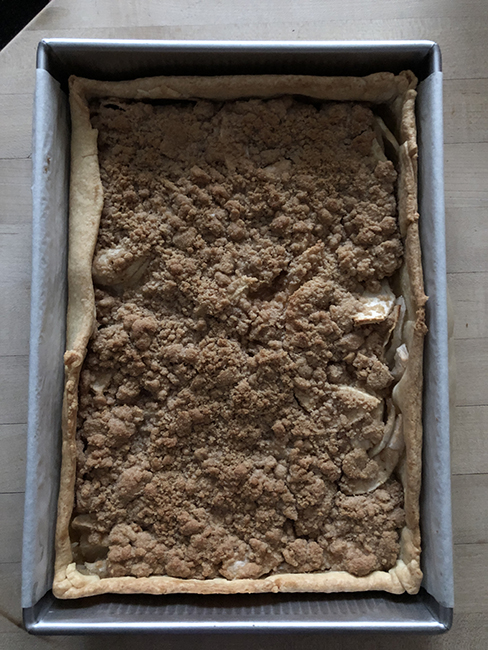
Lightly grease a 13 x 9 x 2 baking pan, and then line it with parchment paper, leaving an overhang on the two long sides – it’s OK if the short ends are simply greased.
On a lightly floured surface, roll out the crust into a very large rectangle that’s about 12 x 18. Gently fold the dough in half, and fit it into the baking pan, patting it up the sides. Chill the crust while you prepare the filling.
Make the filling: Toss the fruit, lemon juice juice, sugar, cornstarch, flour, and salt together in a bowl.
Assemble the pie: Spoon the filling into the crust and crumble the topping on evenly. Bake for 45 minutes to one hour until the filling is bubbling and the topping is crispy. Cover woth foil if the topping seems to be browning too fast. Eat warm or room temperature with ice cream or whipped cream on top.
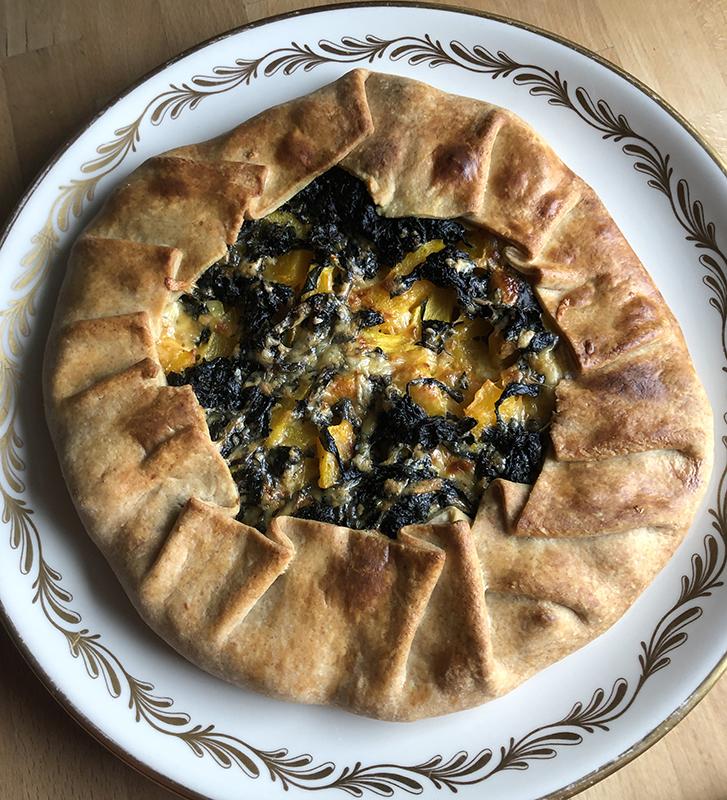
This galette combines greens cooked with garlic and coconut milk with roasted winter squash, and (optional) cheese. It’s impressive enough to be the vegetarian – or vegan – offering at your Thanksgiving, but easy enough for a weeknight, especially if you divide up the steps. You can roast the squash a few days before, make the crust, then simply assemble right before baking. You could even put the whole thing together and cover and refrigerate until you’re ready to bake.
Crust:
2 cups flour – proportions can vary; I used 1 1/2 cups unbleached white and 1/2 cup whole wheat
2 teaspoons sugar
a few pinches of salt (if you use unsalted butter)
9 tablespoons dairy or vegan butter
2 tablespoons vegetable shortening
7-8 tablespoons cold water
Filling:
1 small butternut squash (about 1 1/2 pounds), peeled, seeded and cut into slices
1-2 tablespoons of olive oil
1 bunch of greens, leaves only – I used Komatsuna greens; kale, collards or any sturdy greens will work; you’ll need about 3 cups of raw greens
1 tablespoon olive oil
1 large or 2 smaller cloves of garlic, minced or out through a press
1/2 a 14-oz. can of coconut milk
Salt & freshly ground pepper
Optional (to make it vegan) 1 1/2 to 2 cups grated cheese, your choice – I used Gouda, but any good melting cheese will work
Milk or water for brushing the crust when crimping
Make the crust: measure the flour, salt and sugar into the bowl of your stand mixer (my favorite method), your food processor, or a mixing bowl. Slice the butter and shortening over the top and combine with the flour mixture, using the paddle attachment of the mixer, by pulsing the processor, or using a pastry blender, 2 knives or your fingers, until you have a crumbly mixture with no butter lumps bigger than currants. With the mixer or processor running, or while stirring with fork, drizzle in the water by tablespoons, until the mixture just starts to come together in clumps. Stop before you have one big ball. Turn the crust out onto a floured surface and knead lightly to bring it together. Gather it into a ball, flatten into a disk, wrap (in plastic, wax paper, one of your reusable snack/sandwich bags), and chill for about 30 minutes, and up to 2 days.
Roast the squash: heat the oven to 375°. Line a baking sheet with parchment paper or lightly oil, then arrange the squash pieces on top and drizzle a little more oil over the top. Toss to make sure everything is coated, then roast for about 15-20 minutes until the squash gives when poked with a fork. Cool. If you are baking the galette now, you can leave the oven on.
Cook the greens: heat a large pot of water, and when it’s boiling, add the greens and cook a few minutes until wilted. Drain the greens in a colander and run cold water over them to cool. When the greens are cooled enough to handle, squeeze out as much water as you can by taking handfuls and wringing them out as you would a sponge. Place the squeezed greens on a cutting board and chop. Heat 1 tablespoon of olive oil – you can use the same pot you boiled the greens in – and add the greens. Season with salt & pepper and toss to coat with oil. Add the garlic and continue to cook a few minutes until the garlic doesn’t smell raw. Add the coconut milk. If your coconut milk has separated into a large solid lump with liquid underneath, you might want to transfer the contents of the can into a bowl or spouted measuring cup to stir it back together. Otherwise try to get equal arts to coconut solids and liquid into the pot – the solids should melt pretty quickly over the heat. Stir to combine, bring to a boil, reduce heat and simmer until the thickened. When you run a spoon across the bottom of the pan you won’t see liquid under the greens. Cool.
Assemble: Line a large baking sheet with parchment – I used a 14-inch deep pizza pan; a cookie sheet will work, too. On a floured surface, roll out the crust to a rouhgly 16-inch irregular square. Trim the crust to a 14-inch circle (you can put the trimmings on another baking sheet, sprinkle with cinnamon sugar, and bake for a treat). Fold the crust in half and place it on your baking sheet, and unfold. If using cheese, spread about 3/4 of it on the bottom of the crust, then top with the squash, then greens and sprinkle with the last of the cheese. Brush the edges with milk or water, and fold in, crimping every few inches.
Bake at 375° for about 25 minutes until well browned. Serve warm or room temperature.
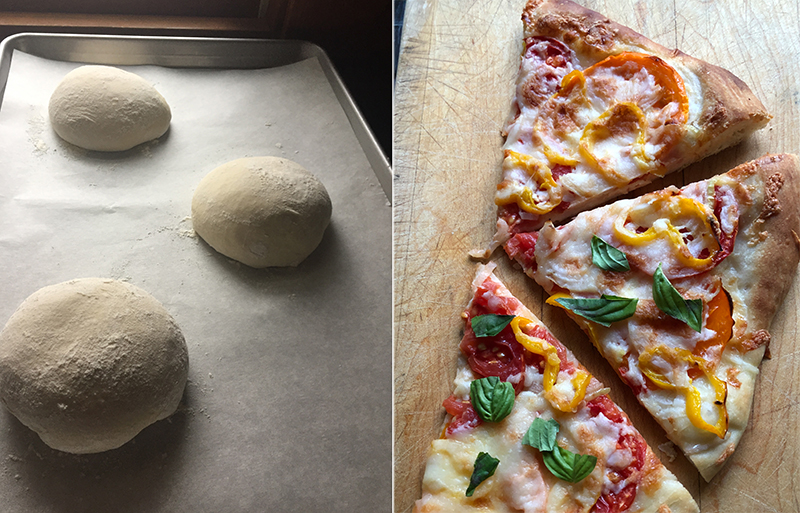
With a little planning ahead, you can have homemade pizza on a homemade crust on a weeknight! This recipe makes enough dough for three 10-12 inch thin pizzas. I often top and cook two to eat right away and partially bake the third to freeze, top, and cook another day. And if you don’t have time to make the dough, Tipi veggies are so delicious they will improve even store-bought crust.
Takes 15 minutes to mix the dough, plus overnight to rise in the refrigerator
Makes crust for three 10-12 inch thin pizzas.
1 1/4 cups lukewarm water (about 80°)
1 teaspoon active dry yeast
1 tablespoon olive oil
1 teaspoon fine sea salt
3 to 3 1/2 cups flour – bread flour if you have it, or unbleached white, or use up to one cup whole wheat
Pour the water into a large mixing bowl, preferably the bowl of a stand mixer, if you have one. Sprinkle in the yeast and leave for about 10 minutes. The yeast should bubble; if not you might want to start over with fresher yeast.
Add the salt, olive oil, and 3 cups flour. Mix with the paddle attachment until you have a soft dough that’s pulling away from the sides of the bowl. If it doesn’t, add the additional flour, up to 1/2 a cup – you want a soft but not too sticky dough. When all the flour is incorporated, let the mixer knead the dough for you, on medium speed for about 4 minutes. I continue with the paddle for kneading, but if you have a dough hook for your mixer, by all means switch. Alternatively, mix in the flour with a large wooden spoon, then turn out onto a floured surface and knead by hand for about 8 minutes, until smooth and elastic.
Line a large baking sheet with parchment paper, and sprinkle it with flour. Turn the dough out onto a well floured surface – if you are kneading by hand it will already be there – and divide it into three equal portions. Form each portion into a ball, and flour it – I like to drop the ball right into my flour canister – and arrange the balls on the baking sheet. Cover with a lid or a damp towel or a large plastic bag, and refrigerate for 8 hours or up to two days.
When you ready to make pizza, oil your pizza pans with olive oil, or line with parchment. Heat the oven to 450°. Remove the dough from the fridge, and roll one piece out on floured surface until it’s about the size of your pan. You can get fancy and spin it in the air if you like! Transfer the dough to the pan, pour about a teaspoon of olive oil on it and continue stretching to the sides of your pan. Don’t worry if you can’t get it all the way to the edge at this point – let it relax and rise while you prepare the toppings and do a final stretch right before topping. Repeat with the other dough pieces.
Top the crust and bake for 15-20 minutes until brown and bubbling. See below for topping suggestions.
Topping suggestions:
The pizza shown uses ingredients from this week’s box, sliced tomatoes and frying peppers and purple onion, with a mix of grated provolone and mozzarella cheese – about 1 1/2 cups grated cheese. Put a layer of cheese on the bottom crust, add the vegetables, brush with olive oil, and then top with a little more cheese. You could also add sliced or minced fresh garlic.
Also suggested by this week’s box is roasted squash, caramelized onion, and goat cheese, although the squash this week might be a bit difficult to peel and cut into cubes to roast – this works better with butternut or delicata. Here’s a recipe for roasted delicata squash, prosciutto, and goat cheese pizza.
Red sauce (see recipe below), sausage, and peppers. You’ll need about 1/4 pound Italian sausage per pizza, either bulk or one link, casing removed, and about one large pepper. I suggest pre-cooking the sausage, and adding the sliced pepper – and throw in some fennel seeds and extra garlic!
Red sauce for pizza
2 pounds peeled and seeded tomatoes, plum preferred
1 large red bell pepper, roasted
2 (or more!) cloves of garlic
1 teaspoon dried oregano, or Penzey’s Frozen Pizza Seasoning, or two tablespoons chopped fresh basil – stirred in after cooking
large pinch of kosher salt
a shake of red pepper flakes
1-2 tablespoons tomato paste
Combine the tomatoes, roasted pepper, and garlic in a food processor, and puree until smooth. Pour into a wide deep skillet over medium heat, and add the dried herbs, salt, and red pepper flakes. Cook for 40-45 minutes, until thickens and the garlic doesn’t smell – or taste – raw any longer. Stir in the tomato paste, and fresh basil if using. Can be frozen.
These sandwiches are what we ate for a picnic on Labor Day: The one on the right is a version of Pan Bagnat, kind of a Nicoise salad featuring tuna and tomatoes, on bread, and the sandwich on the left is a vegetarian version with goat cheese, tomatoes, and roasted peppers. Both sandwiches are brushed with olive oil, and spread with oil-poached garlic. If you are a New York Times subscriber you can watch a video by Melissa Clark (it might play for non-subscribers …) that shows her using her 7-year-old daughter to press the sandwich; if you do not have a 7-yo available, you can use a few heavy cans or jars of food. Like the Cowboy Caviar, feel free to adapt to the vegetables you have on hand.
Takes about 30 minutes to assemble, plus one or two hours to press, and optional chilling time
Serves 4-6
For one sandwich/4-6 servings:
1 ciabatta bread* or 4 crusty Kaiser rolls
1-2 whole bulbs of garlic, depending on size
1/4 to 1/2 cup olive oil
1 dried hot chile
1 red bell pepper, sliced into strips
thin slices of red or other onion
2 medium tomatoes, thinly sliced
a handful of basil leaves, torn into pieces For the tomato-goat cheese variant:
3-4 four ounces goat cheese, softened
1/4 cup roasted red peppers, homemade or from a jar For Pan Bagnat:
one 6 oz. can oil packed tuna
2 tablespoons capers, drained
1/2 zucchini or summer squash, thinly sliced – about 1/2 cup slices
*If you want to try making the ciabatta, this King Arthur recipe works well. Otherwise Madison Sourdough makes a nice ciabatta and you’ll also find it in any grocery store with a good-sized bakery department.
Make the oil-poached garlic: separate the garlic cloves, peel them, and place them in a small saucepan with the dried chile. Pour in olive oil to cover the cloves and cook over medium heat for 10-15 minutes, until the cloves are very soft, checking by poking with a fork. Watch closely so it doesn’t brown or burn. Cool, and fish the cloves of garlic out of the oil and mash them with a fork. Reserve the mashed garlic and oil separately.
Assemble the sandwich(es): Split the bread or rolls. For either variation, start by spreading a good portion of the mashed garlic on the bottoms of the bread. Brush more poaching oil over the garlic, and also brush the tops with oil. For the tomato version, spread goat cheese on the bottom of the sandwich, then layer on the sliced peppers, onion, and roasted peppers. Top with sliced tomatoes and torn basil. For the pan bagnat version, mix the un-drained tuna with the capers, and distribute evenly on the bottom of the sandwich. Shingle the sliced squash over the tuna, layer on the sliced peppers, onion, and top with sliced tomatoes and torn basil.
Press the sandwiches: put the tops on, and wrap in plastic wrap or waxed paper. Place the sandwiches between two cutting boards (or under one cutting board on the counter, if you don’t have two) and top with a few heavy cans – like 28-ounce canned tomatoes – and press for 1-2 hours. After pressing you can serve immediately or chill for several hours or overnight.
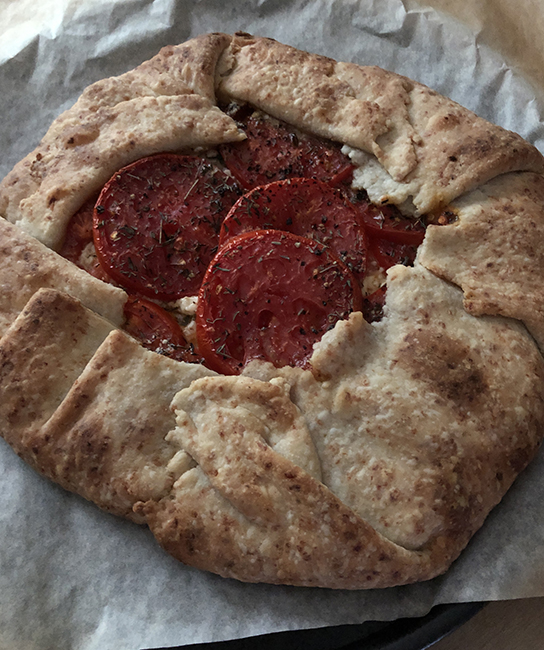
Every summer has to have its edition of tomato pie. (see the Tipi newsletter for prior pies, e.g. tomato handpies from 2021, or Smitten Kitchen’s burst tomato galette, that has corn & summer squash in the filling, or my version of Smitten’s) What makes this pie so appealing is that it avoids sogginess by keeping things simple: the filling is sliced tomatoes, feta, herbs, and shallots – that’s it!
Takes about 45 minutes to assemble and bake, plus 30 minutes to overnight to chill the crust.
Serves 6
Crust:
1 1/2 cups flour
good pinch salt, unless you’re using salted butter
2 teaspoons sugar
1/2 cup butter, either salted or un- (1 stick, 8 tablespoons)
1 tablespoon vegetable shortening or lard
1/2 cup grated Parmesan cheese
2-4 tablespoons cold water
Filling:
4-5 ounces feta cheese (a heaping cup), crumbled
1 medium shallot, finely chopped – about 3 tablespoons
1-2 tablespoon soft fresh herbs, such as basil, parsley, or thyme; or 1 teaspoon dried thyme
1 pound of tomatoes, your choice of variety, sliced about 1/4-inch thick. If you include cherry tomatoes in your mix, cut them in half
freshly ground black pepper and kosher or coarse salt for sprinkling
Make the crust: measure the flour, salt (if using), and sugar into the bowl of your stand mixer (my favorite method), your food processor, or a mixing bowl. Slice the butter and shortening over the top and combine with the flour mixture, using the paddle attachment of the mixer, by pulsing the processor, or using a pastry blender, 2 knives or your fingers, until you have a crumbly mixture with no butter lumps bigger than currants. Add the Parmesan. With the mixer or processor running, or while stirring with a fork, drizzle in the water by tablespoons, until the mixture just starts to come together in clumps. Stop before you have one big ball. Turn the crust out onto a floured surface and knead lightly to bring it together. Gather it into a ball, flatten into a disk, wrap (in plastic, wax paper, one of your reusable snack/sandwich bags), and chill for about 30 minutes, and up to 2 days.
When you’re ready to bake, place a rack in the lower middle of your oven and heat to 400°. Line a baking sheet or pizza pan with parchment paper.
On a lightly floured work surface, roll out the crust to a rough 12-inch or larger round. It’s okay if the dough isn’t perfectly round. Flop the crust in half and transfer to your parchment-lined pan – some people like to roll the dough around the rolling pin, and unroll it onto the pan. Once you have the crust in the pan, spread the feta in an even layer leaving a 2-3 inch border – think a 9-inch circle in the middle of your pan. Scatter the chopped shallot over the cheese, and add half of the chopped herbs, some salt and pepper, and lay the tomatoes on top. If you’re using cherry tomatoes, try to put the halves cut side up.
Gently fold the edges of the crust over the tomatoes, covering about 2 inches of the filling and pleating the crust as you go. Top with the rest of the herbs, and a little more salt.
Bake until the crust is golden-brown and the tomatoes are soft, about 30-45 minutes – watch that the bottom does not get too dark, and move the baking tray to a higher position in the oven if you think that’s starting to happen. Cool on the baking sheet for 5 minutes, then transfer to a wire rack to cool for 10 minutes more. Serve warm or at room temperature.
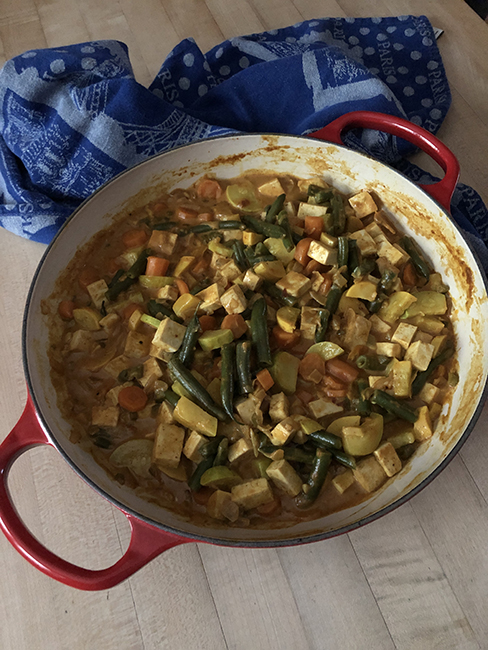
This recipe uses green beans, carrots, and yellow squash from this week’s box, but feel free to adapt to what you have – you will need approximately 6 cups of chopped vegetables altogether, not counting the onions.
Takes about 45 minutes
Serves 6
4 tablespoons coconut oil or olive oil, divided
1 (14-oz.) package firm or extra-firm tofu, patted dry, cut into cubes
a few generous pinches of kosher salt, and freshly ground black pepper
2 cups of chopped onions
a 2-3 inch piece of fresh ginger, peeled and grated
2-3 cloves of garlic, smashed and chopped
2 teaspoons curry powder
1 teaspoon garam masala
1/2 teaspoon each: ground cumin, turmeric, and coriander
1/4 cup tomato paste
1/4-1/3 cups water
a heaping cup of peeled and sliced carrots
8-12 ounces green beans, rinsed, trimmed, and cut into 2 inch pieces – heaping 2 cups
1 (13.5-ounce) can of unsweetened coconut milk – full fat preferred, but lite works
2 large summer squash or zucchini, rinsed, quartered longwise, and cut into chunks – heaping 2 cups
More salt & pepper to taste
Optional: serve with white or brown rice, chutney, and plain yogurt
If you’re serving the curry with rice, start the rice first.
Heat 2 tablespoons of the coconut oil in a wide deep skillet or braiser with a lid. Add the tofu cubes, season with salt and pepper, and fry for about 10 minutes over medium heat, flipping the cubes a few times, trying not to break them up too much, until they’ve gt a little color. Remove to a paper towel lined plate to drain.
Wipe out the pan if necessary (I didn’t) and add the remaining 2 tablespoons of the coconut oil. Over medium high heat, add the onions and another couple of pinches of salt, and stir to coat with oil. Cook the onions for 2-3 minutes, then add the ginger and garlic, curry powder, garam masal, ground cumin, turmeric, and coriander. Continue to cook until the spices are fragrant and the onions, ginger, and garlic are softened, 5-10 minutes. If things start sticking add two tablespoons of the water.
Add the tomato paste and the water, and stir until saucy. Add the carrots and the green beans, cover, reduce the heat, and simmer until softened, about 10 minutes. Again, add a little more water if things start to stick.
Add the coconut milk and mix well. Add the squash, stir and cover and cook for another 10 minutes, until the squash are cooked but not mushy. Taste for salt and serve with the optional garnishes and rice.
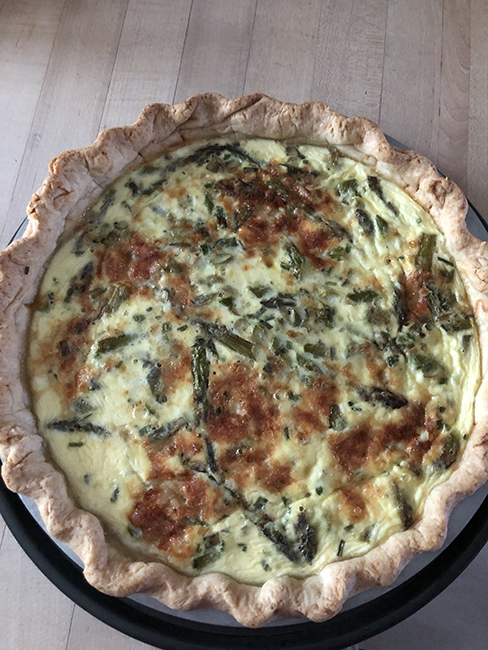
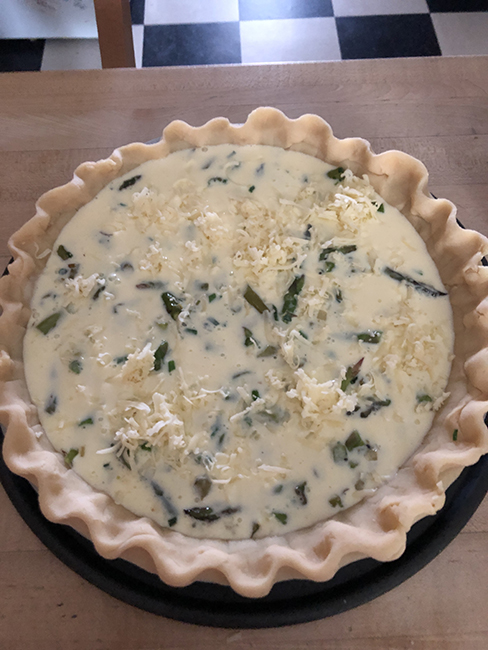
Use this formula to make vegetable – and cheese! – quiche, using just about any vegetable and cheese.
Crust:
1 1/2 cups flour (unbleached white or whole wheat)
good pinch salt, unless you’re using salted butter
2 teaspoons sugar
1/2 cup butter, either salted or un- (1 stick, 8 tablespoons)
1 tablespoon vegetable shortening or lard
1 tablespoon sugar
2-4 tablespoons cold water
Filling:
1-2 tablespoons butter or olive oil
1/2 to 1 cup chopped onion, or other onion-like vegetable – shallots, scallions, leeks, etc.
Two generous cups vegetables, cleaned and sliced, e.g. asparagus, broccoli, mushrooms, kale or other sturdy greens, etc. The exception is spinach – since it will wilt down a lot, you’ll need to start with at least half a pound and up to one pound of spinach.
salt and freshly ground pepper
1 1/2 cups grated cheese, 3-4 ounces, or similar volume crumbled goat cheese or feta
2-4 eggs
1 1/2 to 1 2/3 cups half & half, buttermilk, heavy cream, or a mixture
Make the crust: measure the flour, salt and sugar into the bowl of your stand mixer (my favorite method), your food processor, or a mixing bowl. Slice the butter and shortening over the top and combine with the flour mixture, using the paddle attachment of the mixer, by pulsing the processor, or using a pastry blender, 2 knives, or your fingers, until you have a crumbly mixture with no butter lumps bigger than currants. With the mixer or processor running, or while stirring with fork, drizzle in the water by tablespoons, until the mixture just starts to come together in clumps. Stop before you have one big ball. Turn the crust out onto a floured surface and knead lightly to bring it together. Gather it into a ball, flatten into a disk, wrap (in plastic, wax paper, one of your reusable snack/sandwich bags), and chill for about an hour, and up to 2 days.
When you are ready to assemble the quiche, if the dough has been chilling, get it out of the fridge about 15 minutes before you want to roll it out, to soften just a bit. Roll out the crust and fit it into a shallow 9-inch pie plate, metal preferred. The crust browns better in metal then glass, and tends to slip down the sides less. Set the crust in the fridge or freezer while you prepare the filling.
Make the filling: melt the butter or pour the olive oil in a 10-12 inch skillet with a lid. Add the onions and sauté over medium heat until softened but not browned, 5-10 minutes. If you are using a vegetable with harder parts, such as asparagus stalks or broccoli or chard stems, add them now. Season with salt and pepper and continue to cook until starting to soften, another 5 minutes or so. Add the rest of the vegetable, e.g. asparagus tips or broccoli florets. Cover the pan the let everything steam until the vegetables are done to your liking – they should be a little underdone than for regular eating, since they will cook again in the quiche. If you are using greens add them to the onion mixture, and cover right away to wilt. Remove the lid and cook for a few more minutes to boil off any excess liquid. remove from the heat and let cool.
Assemble the quiche: Heat the oven to 375° Get the quiche crust out of the fridge or freezer, and place it on a cookie sheet or pizza pan, dark colored (better for browning) if you have one.
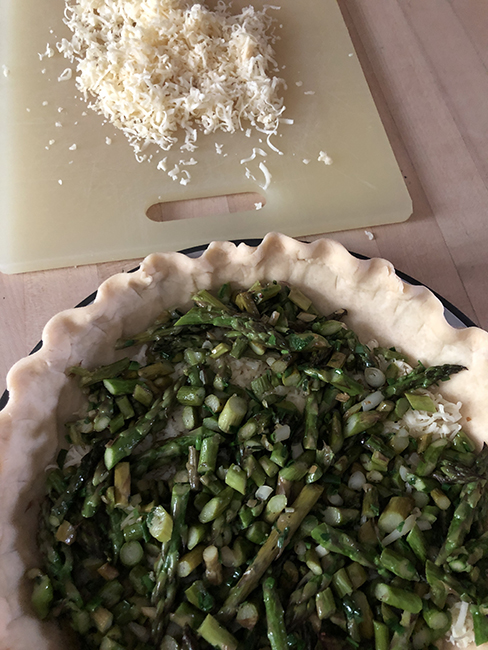
Sprinkle a layer of cheese into the bottom of the crust, reserving about 1/3 cup for topping. Beat the eggs in a spouted measuring cup that’s at least 2 cups (one pint) or larger if you have one. Add enough of whatever dairy product you are using to come to 2 1/4 cups. Add the vegetable filling on top of the cheese, and then pour in the egg mixture. Some people like to put the vegetable & cheese filled quiche onto the oven rack, and then add the egg to avoid having to walk across the kitchen with a liquid-filled quiche. If your oven racks don’t slide in smoothly you might spill the quiche at that point, however.
Bake for about 25 minutes on an upper rack then move to a lower rack and back another 20 minutes or so until puffed and golden. Allow to rest for about 15 minutes before cutting and serving. Enjoy hot or room temperature.
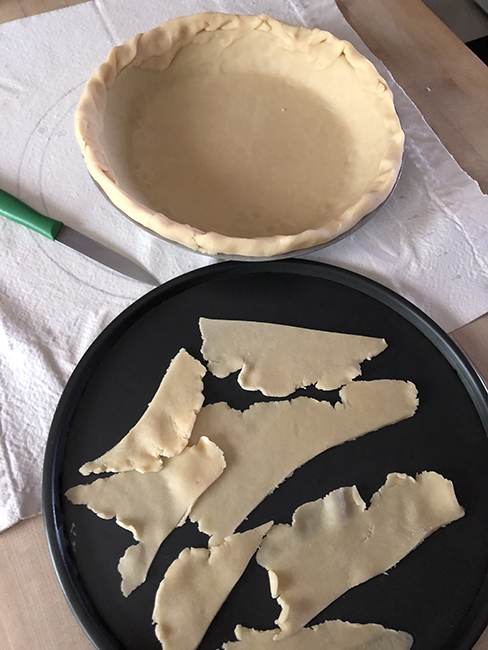
Rolled out piecrust.Flop the pie crust in half and place it in the pan. Unfold and gently fit into the pie dish.Trim the edges of the pie crust, and roll the remainder to make a neat edge. Place the trimmings on another cookie sheet. Sprinkle with cinnamon sugar and bake along with the quiche for a treat. Watch carefully – they cook fast! Done in 10 minutes or less.Crimp the edges – this pattern was made with 2 fingers and a thumb – you can also crimp the edge with a fork. Place the crust in the fridge or freezer while you make the filling.Add the cheese first, then top with the vegetables.Pour the egg mixture over the vegetables, and sprinkle on a little extra cheese.
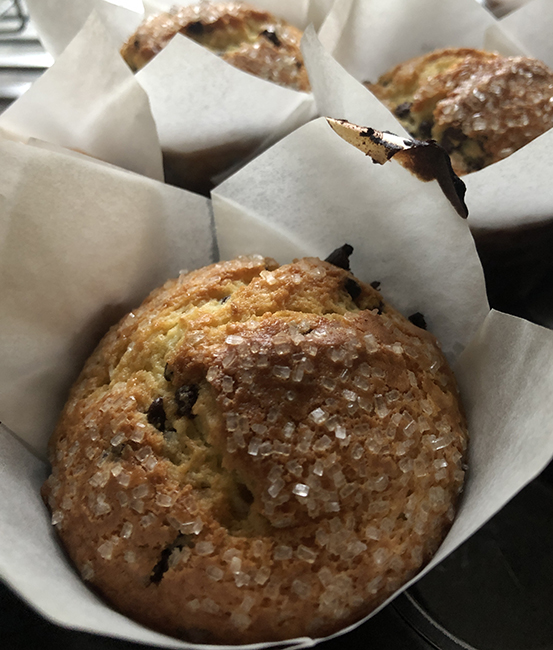
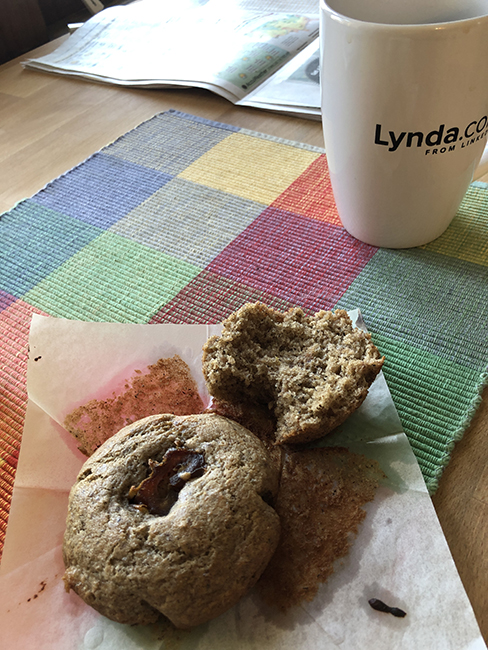
On a Monday morning, I was musing on what kind of muffin to make, using up various things that I had in the fridge and kitchen; banana? No, we’ll probably want to eat the bananas. Buckwheat flour? No, I made some buckwheat-date muffins recently, the ones I always make after Passover to use up the charoset. Ricotta? Yes! These are based on Yossi Arefi’s Black- and Blueberry Ricotta cake. I only have frozen blueberries right now, so was considering, and when I saw her suggestion of chocolate chips, that did it.
Ingredients:
1 cup + 2 tablespoons sugar
3 large eggs
3/4 cup unflavored oil, such as safflower or canola
1 1/2 to scant 2 cups ricotta (16-oz. container with like a spoonful out)
1 1/2 teaspoons vanilla
1 teaspoon kosher salt
grated zest of one organic orange
1 3/4 cups + 2 tablespoons flour
1 teaspoon baking powder
1/2 teaspoon baking soda
1 3/4 cups mini chocolate chips
coarse sugar for sprinkling on top
Grease or line the wells of a 12-cup muffin tin with papers. You might need one extra muffin cup or ramekin – I got 13 muffins, baker’s dozen. Heat the oven to 375°
Break the eggs into a large mixing bowl, and add the sugar. Beat with a whisk until it’s looking a bit lightened – about 3 minutes. Pour in the oil and whisk until it’s nicely emulsified. Beat in the ricotta, breaking up the lumps until smooth. Add the vanilla and salt, grate in the orange zest, and stir. Switch from the whisk to a silicone spatula, and mix in the flour, the baking powder and soda, then fold in the chocolate chips.
Scoop the batter into the muffin tin, and sprinkle with sugar.
Bake for about 25 minutes until nicely browned and firm.
For the dough:
1/4 cup water
2 1/4 teaspoons active dry yeast (1 packet)
1/4 cup dark brown sugar
1 cup buttermilk or whole milk yogurt at room temperature
5 tablespoons unsalted butter, softened
2 teaspoons salt (or just a pinch if you use salted butter)
3 cups unbleached white flour
For the filling:
3/4 cup King Arthur Baker’s Cinnamon Filling, and 2 – 3 tablespoons water
OR
Use this filling
OR
Date filling:
1 lightly packed cup of pitted and chopped dates, preferably Medjool
!/4 cup dark brown sugar
2 teaspoons cinnamon
2 tablespoons vegetable oil
pinch of kosher salt
For the glaze:
2 tablespoons cream cheese, softened – microwave for about 10 seconds if you forget to leave it out
1 lightly packed cup powdered sugar
1-2 tablespoons milk
1/2 tsp. vanilla
Make the dough: Pour the 1/4 cup water into the bowl of a stand mixer. Sprinkle in the yeast, and let it soften. Add the sugar and buttermilk or yogurt. With the paddle beater, mix in the salt and a cup or two of flour. Start adding the butter by tablespoons. Add enough of the rest of the flour to make a very soft dough. Mix/knead on medium speed for five minutes. Form the dough into a ball and transfer to a plastic container with room to let it rise. 2 quarts is a good size if you have one, otherwise cover the mixing bowl airtight. Refrigerate the dough for 8 hours or up to 24.
Make the filling: Place the dates in a heat proof bowl and pour in 1 cup boiling water. Let stand to soften, 10 minutes or more. Drain the dates, and puree in a food processor with the sugar, oil, and salt. You can refrigerate the filling while the dough rises in the fridge. Let it come to room temperature before assembling the buns or it wil be difficult to spread.
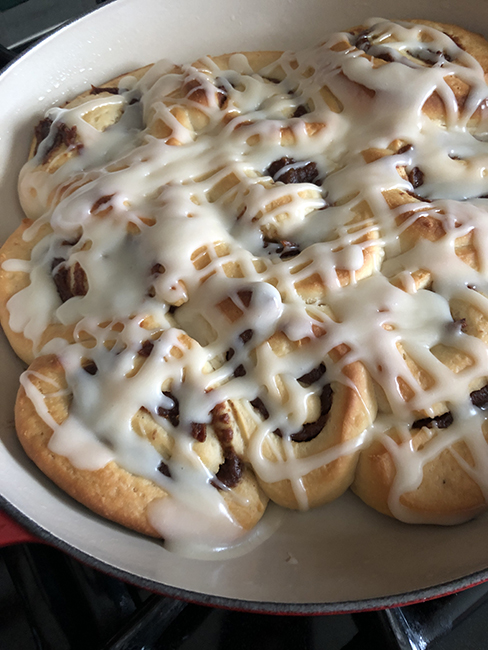
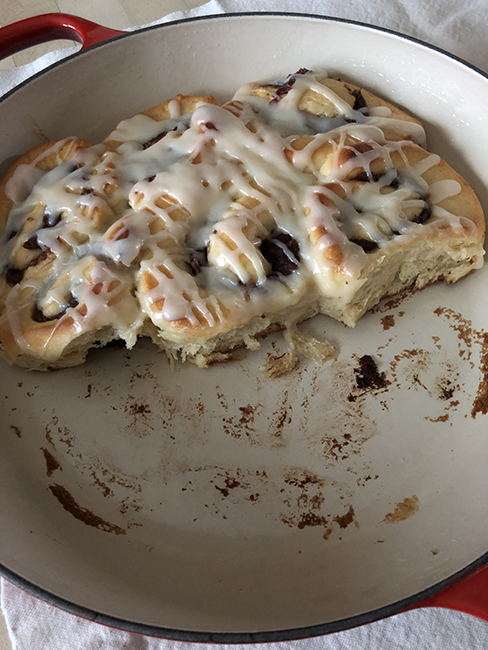
Assemble and bake the buns: Grease a 10-12″ cast-iron skillet or 9-10″ cake pan with vegetable oil or butter. Remove the dough from the fridge, and scrape out onto a very lightly floured surface. I like to use a pastry cloth (sometimes called a frame); it’s a piece of heavy cotton printed with a ruler and circles for rolling out the dough. Roll the dough out to an 8″ square. Fold in half into an 8 x 4″ rectangle, then fold rectangle over itself to form a 4″ square. If the dough resists, let it rest about 5 minutes to relax and try again. After the second folding, roll out the dough to a 10 x 12″ rectangle. Dollop the cinnamon filling of your choice onto the sough and spread it, leaving about a 1-inch border on one of the long sides, and going right up to the edge on the short sides.
Roll the dough up tightly and pinch closed. Cut the roll into 9 slices with a chef’s knife or (unflavored!) dental floss and place them in the pan. Cover the pan with a domed lid if you have one, or greased foil if not. Let the covered buns rise until puffy, 1 to 1 1/2 hours depending on how warm your kitchen is.
Heat the oven to 350° and bake the still-covered buns for about 20 minutes, until they are risen and firm but not browned. Remove the lid, and continue to bake another 15-25 minutes until nicely browned.
Finish: While the buns are baking, mix up the glaze. Put the cream cheese in a bowl and whisk in the powdered sugar, milk, and vanilla.
When the buns are done, remove from the oven and let cool for 10 minutes. Drizzle the glaze over and serve warm!
