I made these 4th of July weekend, but I didn’t want to call them 4th of July Blueberry Tarts, because 2026 has to have been the worst 4th of July ever. See The worst 4th of July ever over on debslunch.
Even though I always think of July 4th as the official start of blueberry season.
I couldn’t call them Midsummer Blueberry Tarts, because even though I always think of July 4 as the middle of the summer, there already is a Midsummer and it’s June 21.
So High Summer Blueberry Tarts it is. Everyone who has tasted them likes them. One nice thing about this recipe is you don’t have to plan ahead much. The press-in crust is made with cold butter and the crumb topping is melted butter. So no planning ahead to soften and bring ingredients to room temp.
For the blueberry filling:
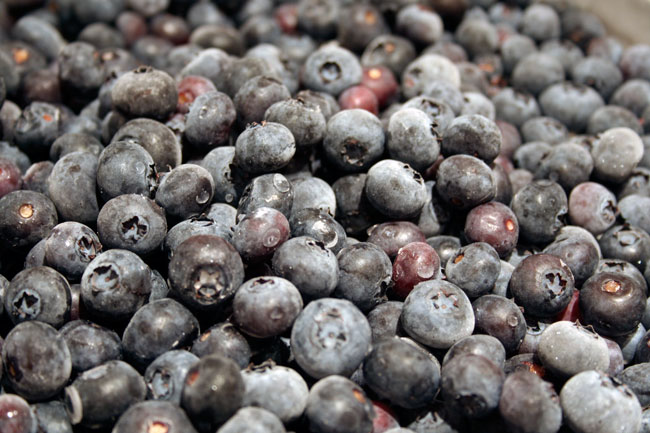
one pint, 2 scant cups blueberries, fresh or thawed frozen*
2 tablespoons cornstarch
1/4 cup sugar
3 tablespoons lemon juice
For the crust:
250g, 2 cups + 1 tablespoon flour
125g, 3/4 cup granulated sugar
9 tablespoons, 1 stick + 1 tablespoon unsalted butter, sliced into tablespoons
1 egg beaten with 1 teaspoon of vanilla and 1 teaspoon water
For the lemon crumble topping:
4 tablespoons butter, melted
3 tablespoons granulated sugar
11 tablespoons flour
grated zest of one lemon
Grease and flour the wells of a 12-cup muffin tin. Heat the oven the 325°.
Make the filling: combine the blueberries, cornstarch, and sugar in a bowl. Add the lemon juice and toss to combine. Leave to marinate, tossing a few more times to dissolve the sugar and cornstarch.
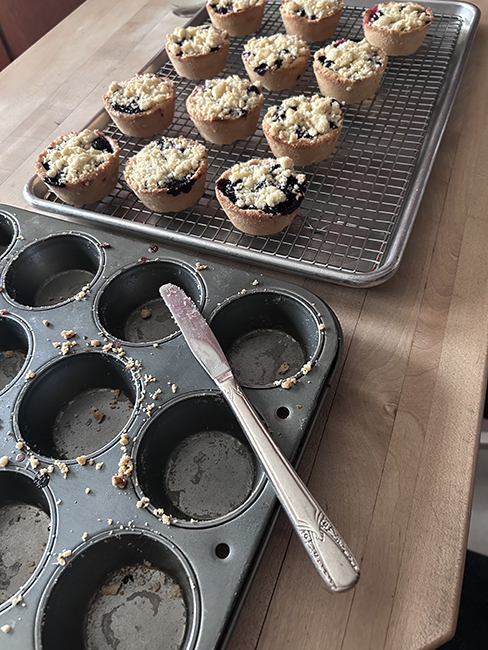
Make the crust: Measure or weigh the flour and sugar into the bowl of a food processor, and pulse a few times to combine. Drop in the butter, pulse a few times to combine, then process until you have a powdery mixture. Add the egg, vanilla, and water mixture, and pulse again until you have clumps. Turn the clumps of dough out onto a lightly floured surface and draw them together into a ball with your hands, then shape the dough into a fat log and cut it into 12 slices. Press the dough into the wells of your prepared muffin tin by forming each slice into a disk, placing the disk in a well, and pressing the dough up the sides, keeping the thickness as even as possible.
Bake the tarts: Give the blueberry filling a good stir and divide it evenly into the 12 crust-lined wells of the muffin tin. Place in the preheated oven and bake for 18-20 minutes until the blueberries are puffed and the juices are stating to bubble.
Make the crumble: Add the sugar, flour, and lemon zest to the melted butter and stir with a fork until crumbly. If it’s warm in your kitchen, place the crumble in the fridge while the tarts bake.
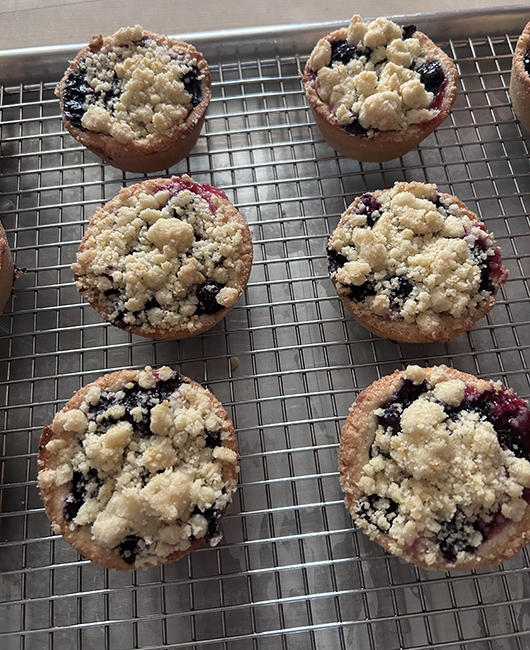
Top the tarts: Remove the tarts from the oven and spoon on the crumble topping, dividing it as evenly as possible and heaping it on where necessary (it will sink a bit after baking). Bake the topped tarts for another 15-20 minutes until the crumble is lightly browned and the filling is bubbling through in some places.
Cool the tarts in the pan for about 10 minutes, just until cool enough to handle, then use a thin knife to release the sides and move the tarts to a rack. Eat warm or at room temp. The tarts will keep for 3 days at room temperature, refrigerate for longer storage. I haven’t tried freezing them but I bet it would work, as long as they are thoroughly cooled and well-wrapped before going into the freezer.
*to thaw blueberries for this recipe, place 2 generous cups frozen blueberries in a colander. Run cold water over the blueberries and leave them to thaw for about 20-30 minutes, during which time you can work on the other parts of the recipe. And if you’re asking why this note says “generous” 2 cups while the main recipe says “scant” for fresh, it’s because frozen berries shrink a little when they’re thawed.


 Based on a Smitten Kitchen recipe, (