Broccoli Hand Pies

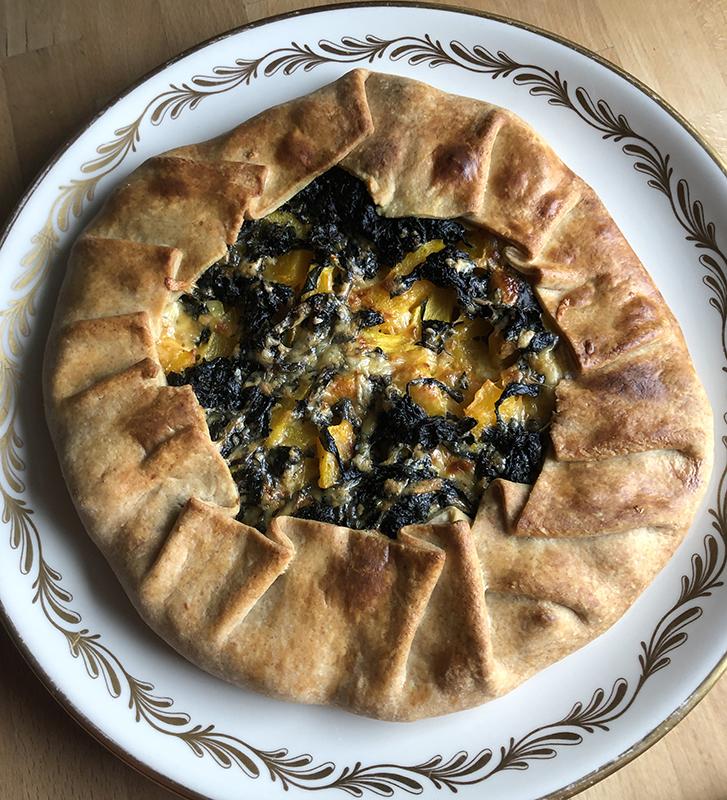
I was intrigued by this recipe because it uses a thick cheese sauce as the base for the filling, and you mix in the cooked broccoli. It’s kind of like making the base of a souffle. The original recipe says to chop the broccoli, blanch it, cool in an ice bath, and finally chop it really fine in your food processor. That seemed like overkill to me; I suppose it’s what you would do to conceal the broccoli from your kids! Or to prevent someone from taking a bite and getting hit on the chin with a big sprig of broccoli …. I simply chopped the broccoli and cooked it, then drained and rinsed with some cold water and proceeded, and there were no biting in mishaps when we ate the hand pies for brunch!

You could make these vegan by using vegan butter or vegetable shortening in the crust and non-dairy milk and vegan cheese in the filling. And instead of egg wash, brush the pies with the non-dairy milk.

Makes 8-9 handpies

Crust:
1 1/2 cups unbleached flour
2 teaspoons sugar
pinch of kosher salt
1 stick (8 Tablespoons) unsalted butter
1 tablespoon vegetable shortening
3-4 tablespoons cold water

Cheese sauce:
2 tablespoons unsalted butter (I used some garlic butter I had on hand and omitted the garlic)
one medium shallot, finely chopped (about 3 tablespoons) or 1/4 cup onion, also finely chopped
1 garlic clove minced or put through a press
Kosher salt and freshly ground black pepper
2 tablespoons tablespoon all-purpose flour
1/2 cup whole milk
1/2 teaspoon sweet paprika
1/2 teaspoon dry mustard
salt and ground white pepper to taste
scant cup grated cheddar or other sharp cheese of your choosing (about 2 ounces)

Filling:
I large head of broccoli, finely chopped

Assembly:
1 egg, beaten with a dash of milk or cream or water
equipment: rolling pin, parchment, pastry brush, 3-inch cutter

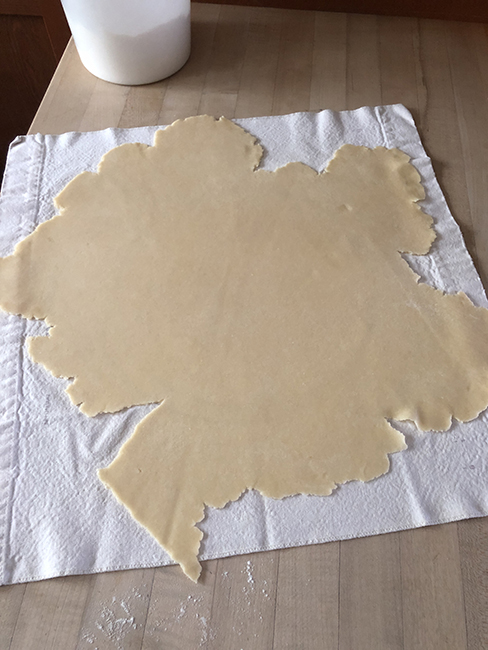
  1. Make the crust and chill: Measure the flour into a bowl and add the sugar and salt. Slice the shortening and butter into cubes and drop into the flour mixture. Cut the fats into the flour with your fingers, a pastry blender, or paddle attachment of your stand mixer, until the mixture resembles coarse meal. Drizzle in the water by tablespoons while stirring, until you’ve got a bunch of small clumps of dough. Dump out onto a floured surface, knead lightly to bring it together, and then flatten the dough into a disk and wrap in wax paper or plastic wrap and chill for about an hour. (Or, the original recipe calls for a 14.1 ounce box of refrigerated pie crust that you just have to unfold.)
  2. Make the cheese sauce: Melt the butter in a medium saucepan over low heat. Add the onion and garlic and cook until softened but not browned, a minute or so. Stir in the flour with a wooden spoon, and cook until bubbly. Switch to a whisk pour in the milk in a steady stream while whisking constantly. Continue whisking until no lumps remain. Stir in the paprika, mustard, and salt and pepper to taste. Scrape into a mixing bowl. Stir in the cheese and set aside to cool while you cook the broccoli.
  3. Cook the broccoli: In a medium saucepan (you can use the same one from the cheese sauce, cleaned out), bring enough water to cover the broccoli to a boil and add a good pinch of salt. Add the broccoli cook until tender but still bright green 3-5 minutes. Pour the broccoli into a large strainer to drain, and rinse with cold water to stop the cooking. Leave in the strainer to drain while you roll out the crust. When it’s well-drained, measure 1 cup of the cooked broccoli and mix into the cheese sauce for the filling. If you have extra, save for another purpose, like lunch the next day.
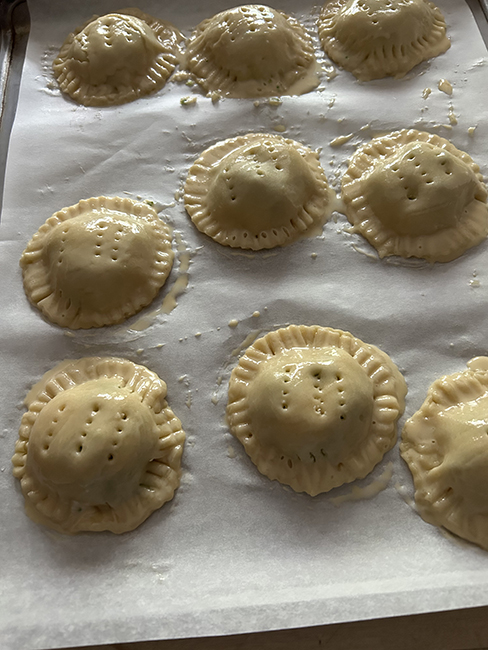
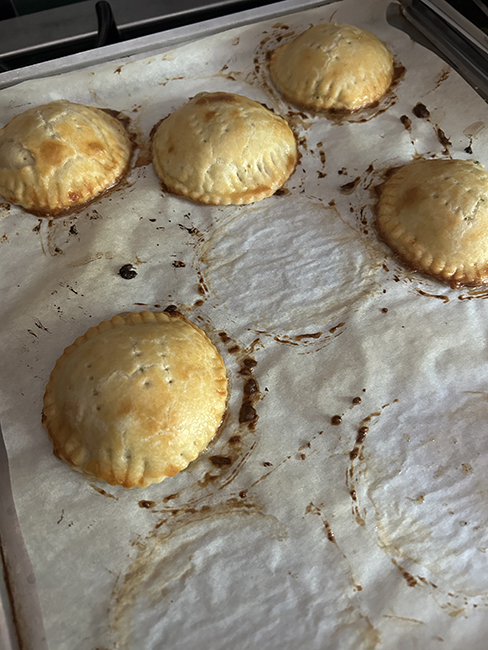
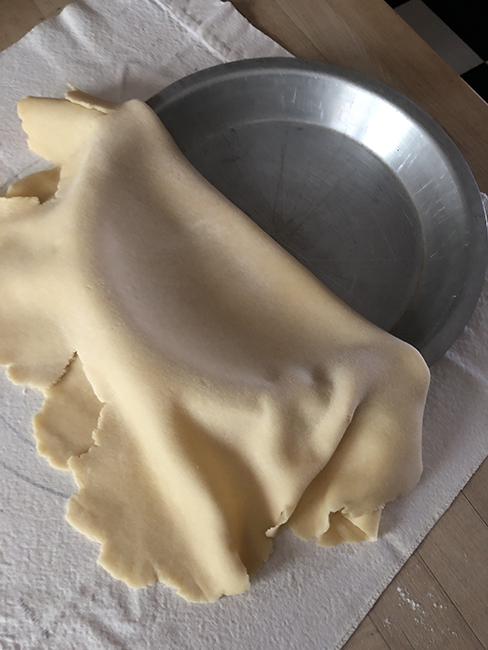
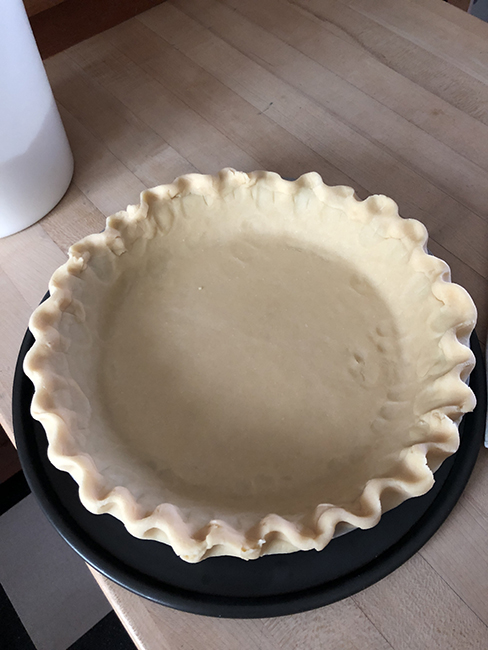
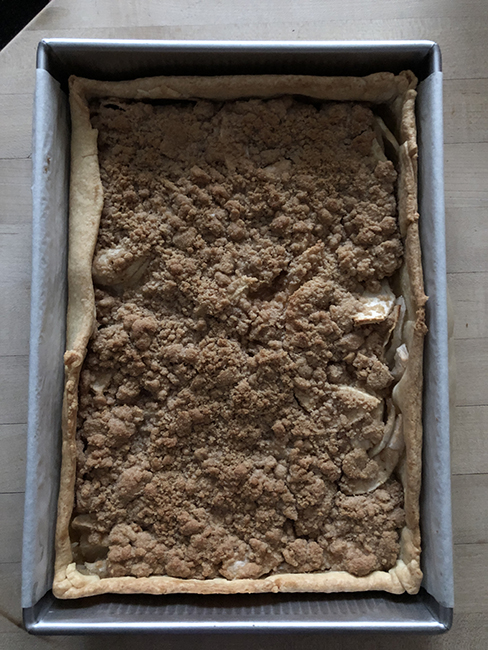
  4. Roll out the crust and assemble the pies: Heat the oven to 400° and line a baking sheet with parchment. Divide the dough in half and on a lightly floured surface, roll out the first half. Cut 8-9 circles with the three-inch cutter and arrange the circles on the parchment-lined sheet. Brush each circle with egg wash, and place 2 tablespoons of filling in the center of each. Roll out the second half of the dough, and cut 8-9 more circles. Place a circle on top of each of the pies and with your fingers, press the edges to adhere, then crimp the edges with a fork. Brush the tops of the pies generously with the egg wash, then stab 2-3 rows of steam holes in each top with your fork – do this after the egg wash otherwise the wash will close up the holes! Place in the preheated over and bake for 20-25 minutes until browned. Serve warm or at room temperature.

Calabacitas Quiche

Elsewhere on this blog you’ll find a recipe for calabacitas, a cheesy mix of zucchini, corn, and green chiles served in New Mexico. You can use calabacitas as an enchilada filling, and a few years ago – gosh more than a few, like 15, 2008! – I thought it’d be a nice quiche filling too. Calabacitas Quiche was my contribution to the 2008 Pie Palooza, a benefit formerly put on by REAP Food Group. I even printed labels with all the ingredients.

Here’s the recipe:

Serves: 6-8
Takes: about 40 mins. active time, plus an hour to chill the crust.

Crust ingredients:
1 1/2 cups flour
nice pinch of kosher salt
2 teaspoons sugar
6 tablespoons unsalted butter
3 tablespoons vegetable shortening
3-4 tablespoons cold water

Filling ingredients:
2 tablespoons butter
One bunch of scallions, sliced, including white and green OR 3/4 cup chopped onion
1 large zucchini or 2 small, or a mix of zucchini and yellow squash, quartered longwise, and sliced
1 large or 2 small poblano chiles, roasted, skinned, seeded, and chopped OR one 4 oz. can mild green chlies
3/4 – 1 cup corn kernels, fresh cut from 1-2 ears, frozen, canned, or whatever you’ve got
salt & fresh ground black pepper to taste
1 cup grated cheddar cheese
3 eggs
1 1/2 cups half & half

  1. Make the crust: Measure the flour into a bowl and add the sugar and salt. Slice the shortening and butter into cubes and drop into the flour mixture. Cut the fats into the flour with your fingers, a pastry blender, or paddle attachment of your stand mixer, until the mixture resembles coarse meal. Drizzle in the water by tablespoons while stirring, until you’ve got a bunch of small clumps of dough. Dump out onto a floured surface, knead lightly to bring it together, and then flatten the dough into a disk and wrap in wax paper or plastic wrap and chill for about an hour.
  2. Make the filling: melt the butter in a large skillet, and add the scallions or onion. Sauté over medium heat until the onion looks translucent, then add the zucchini. Cook until the zucchini is starting to soften, and then add the poblanos or chiles, corn, and salt & pepper. Cook until the squash is just tender, and then set aside to cool.
  3. Assemble the quiche: Heat the oven to 375° with a rack near the bottom and another near the middle of your oven. Roll out the crust and fit it into a 9-10 inch pie dish. Put 2/3 of a cup of the grated cheese in the bottom, then add the zucchini filling. You’ll find some images of rolling out crust and fitting it into a pie dish here.
  4. Beat the eggs, add the half & half, and pour this custard into the crust.
  5. Place the quiche on the bottom rack and bake for 10 minutes. Sprinkle the remaining 1/3 cup of cheese over the top of the quiche, and bake for another 10 minutes. Move the quiche up to the middle rack and continue baking until it is puffed and golden brown in spots, about 20 minutes more. Cool for 15 minutes before serving either hot or warm.


Asparagus Custard Tart

Mothers Day 2023 asparagus custard tart

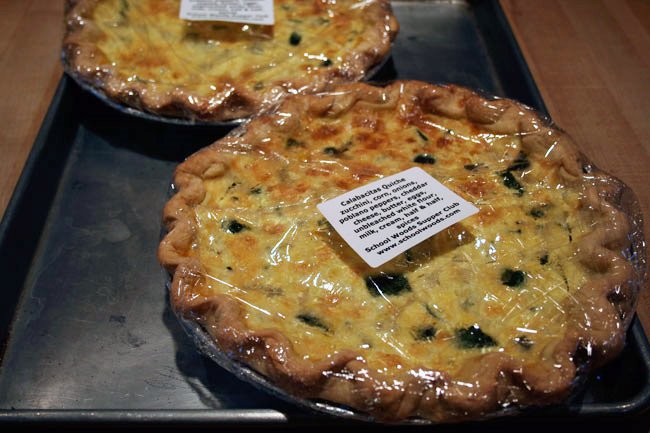
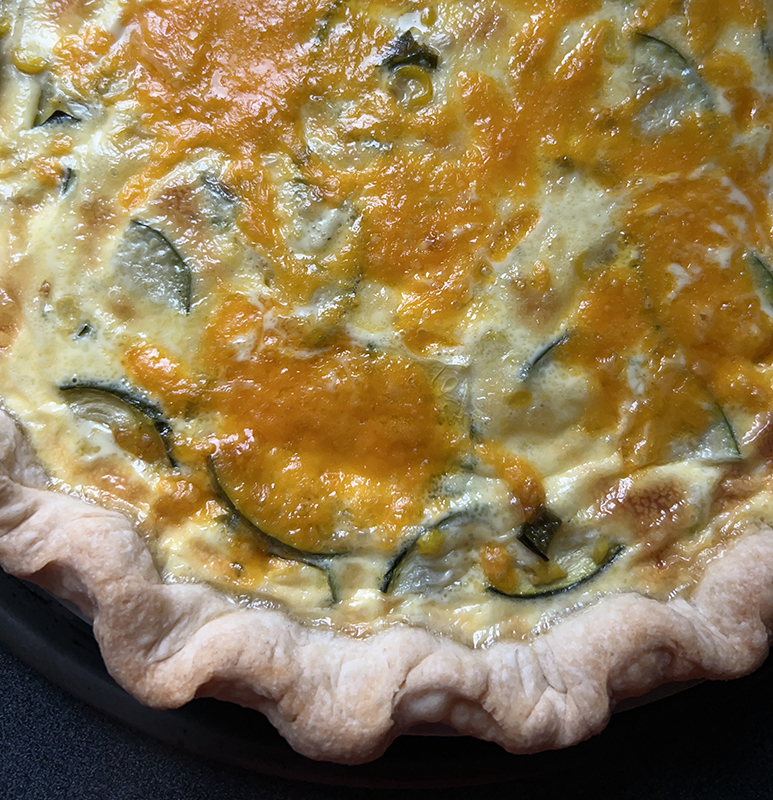
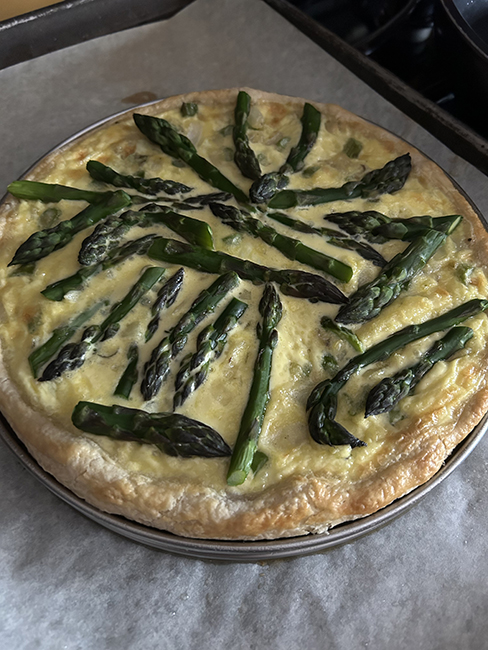
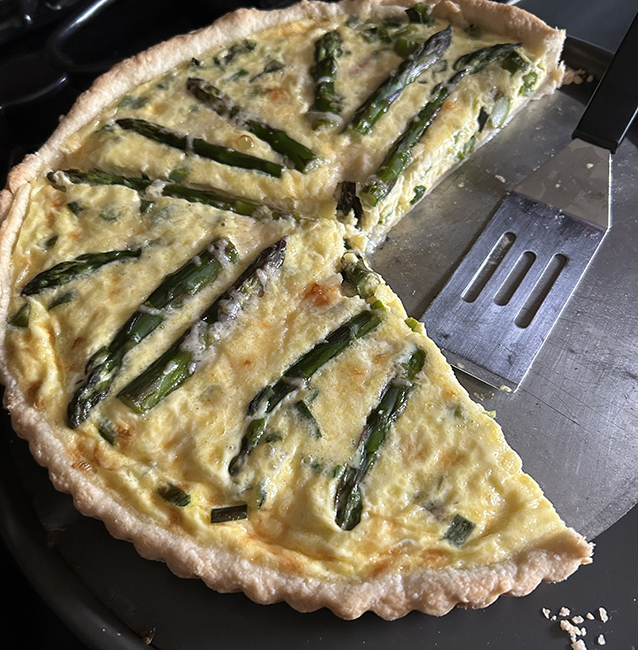
This tart is a little more elegant than a standard quiche, and intended to be baked in a 9- or 10-inch flan ring or loose bottom fluted pan – the kind where you can detach the bottom from the sides after baking. But if you don’t have either of those pieces of kitchen equipment, you can bake the tart in a regular pie pan. A shallow, metal, 9-10 inch pie pan will work best. The custard is made with heavy cream, so it’s rich, but there’s no cheese in the tart.

Crust:
1 cup all-purpose flour
a pinch or two of kosher salt
6 tablespoons cold unsalted butter, cut into bits
1 large egg, lightly beaten
a few tablespoons of water if necessary

Filling
half a large onion, finely chopped – about 3/4 cup
1 pound of medium asparagus, washed trimmed
1 tablespoon butter
Kosher salt & freshly ground black pepper, to taste
1 cup heavy cream
3 large eggs, one separated

    1. Make the crust: combine the flour and salt in a bowl , food processor, ir bowl of a stand mixer. Slice in the butter, and mix with your fingertips or a pastry blender, or pulsing in the food processor, or with the paddle attachment of the mixer until most of mixture resembles coarse meal with only a few butter lumps. Drizzle the egg in and mix just until the dough starts to come together, adding water by the tablespoon if needed.
    2. In the bowl or on a floured surface, gather the dough into a ball, and flatten into a disk. Wrap airtight in plastic wrap or other reusable wrapping and chill for at least 30 minutes and up to 2 days.
    3. Make filling: bring several inches of water to a boil in a wide deep skillet, add salt, and then add the asparagus spears. Cook just until the asparagus is bright green, then with tongs transfer to a colander set in the sink, and run cold water over to stop the cooking. Drain the asparagus well.
    4. Empty the skillet and dry it, then melt the butter and sautée the onion gently until tender but not browned. Meanwhile cut the  tips off the asparagus in about 3-inch lengths and slice the remaining stalks into 1-inch pieces. Reserve the tips. When the onion is soft add the sliced asparagus, season with salt and pepper, mix well, and remove from the heat.
    5. Assemble the tart: heat the oven to 375°. Roll out the crust and fit it into the pan of your choosing. If using a flan ring or fluted tart pan place it on a cookie sheet or pizza pan lined with parchment to catch any drips. Trim the overhang, leaving enough to build up a double thickness for a nice sidewall. If using a pie dish crimp the edges, and optionally set it on a cookie sheet or pizza pan to catch any drips.
    6. Brush the crust all over with the white of the separated egg. Beat the yolk and the remaining eggs together and add the cream. Spoon the onion and sliced asparagus stalks into the crust and pour the custard over.
    7. Bake the tart for about 20 minutes until the filling is starting to set but there are still liquid spots. Remove from the oven and scatter the asparagus tips over the top of the tart, pressing down gently to settle them in the custard. Return the tart to the oven and bake another 20-30 minutes until fully set.
    8. Cool tart on the baking sheet on a rack for 15-30 minutes, then if using a flan ring or tart pan, loosen edges with a small sharp knife, and lift off the sides for easier cutting. Serve warm or at room temperature.

100% Rhubarb Pie


This is my recipe for an all-rhubarb pie, a pie that, as the New York Times asserts in its Straight Up Rhubarb Pie recipe, “contains no distractions, like strawberries”. If you want strawberries with your rhubarb, go here.

Ingredients:

Pie dough for a 2-crust pie, or use your own favorite recipe, or purchased. I like to make this pie with a lattice top, but you can also make it with a top crust, with vents cut in, in a decorative pattern.

3 1/2 to 4 cups chopped rhubarb (about 1-inch pieces)
1 1/2 cups sugar
5 tablespoons flour
pinch of salt, or use salted butter
about 1 tablespoon of butter

  1. Preheat the oven to 400°.
  2. Mix the flour, sugar, and salt, if using.
  3. Roll out the bottom crust and ease it into a deep 9-inch pie dish. Spread 1/4 cup of the flour mixture in the bottom crust. Set the crust on a baking sheet (I like to use a 12-inch pizza pan, but a cookie sheet also works fine) and place it in the fridge.
  4. Place the rhubarb in a large bowl, and add the rest of the flour mixture to the fruit and toss well.
  5. Roll the top crust out into a approximately 10 x 10 inch rectangle and and cut it into strips – with wheel or a decorative cutter if you have one – the one I use (shown above) is actually for making the ruffled edges of lasagna noodles.
  6. Toss the fruit again, and pour it into the bottom crust.
  7. Dot the fruit with small pieces of butter, using your 1 tablespoon or a little more.
  8. Weave the crust strips into a lattice – here’s a demo video from Sally’s Baking Addiction, or just use what you remember from making woven potholders for your mom. After you weave the top, roll the ends of the strips in with the edges of the crust & crimp. Sally uses a knuckle and two fingers; I use my thumb. You can also use a fork.
  9. Bake the pie for 10 minutes then reduce the heat to 375°. Bake for about another 50 minutes, until the filling is bubbling and the top is rounded. Cover loosely with foil if the crust browns too fast. Let cool at least 1 hour or the filling will be really soupy, and eat with vanilla ice cream.
Photo by Lori Rice for Simply Recipes

Perfect pie crust

Pie crust was one of the first things I was taught to make, and I have always used my mom’s recipe – 3 cups flour to 1 cup butter, with 1 TBLS sugar per cup of flour for a sweet, double crust pie. And I tended to use unsalted butter, which makes a good tasting, but not flaky crust. For flakes you need shortening or lard. Recently I’ve been playing around with both the proportions, and the type of fat – mom used salted margarine – and I have decided that I like the original proportions, but with salted butter, plus two TBLS vegetable shortening or lard.

3 cups flour (unbleached white or whole wheat, or a combo)
good pinch salt, unless you’re using salted butter
3 tablespoons  sugar
1 cup butter, either salted or un- (2 sticks, 16 tablespoons)
2 tablespoons vegetable shortening or lard
5-7 tablespoons cold water

Measure the flour, salt and sugar into the bowl of your stand mixer (my favorite method), your food processor, or a mixing bowl. Slice the butter and shortening over the top and combine with the flour mixture, using the paddle attachment of the mixer, by pulsing the processor, or using a pastry blender, 2 knives, or your fingers, until you have a crumbly mixture with no butter lumps bigger than currants. With the mixer or processor running, or while stirring with fork, drizzle in the water by tablespoons, until the mixture just starts to come together in clumps. Stop before you have one big ball. Turn the crust out onto a floured surface and knead lightly to bring it together. Gather it into a ball, flatten into a disk, wrap (in plastic, wax paper, one of your reusable snack/sandwich bags), and chill for about an hour, and up to 2 days.

This makes enough crust for 2 single crust pies or one double crust or lattice topped pie.

For a lattice crust, roll out the bottom crust and ease it into the pie dish. Set the crust in the fridge. Make the filling. Roll out the top crust and cut it into strips – with a decorative cutter if you have one – the one I use is actually for making the ruffled edges of lasagna noodles. Pour the filling into the bottom crust – it helps to take it out of the fridge at this point. Weave the crust strips into a lattice – use what you remember from making woven potholders for your mom.

See pictures below.

Lattice apple pie
Rolled out piecrust
Flop the pie crust in half and place it in the pan. Unfold and gently fit into the pie dish
Crimp the edges – this pattern was made with 2 fingers and a thumb – you can also crimp the edge with a fork. Place the crust in the fridge or freezer while you make the filling

Apple slab pie

Crust:
2 cups unbleached white flour
2 tablespoons sugar
a few pinches of salt (if you use unsalted butter)
9 tablespoons dairy OR vegan butter
3 tablespoons vegetable shortening
7-8 tablespoons cold water

Topping
1 1/2 cups flour
1 teaspoon baking powder
3 tablespoons sugar
3 tablespoons light brown sugar
1 teaspoon cinnamon
A few grates of nutmeg
About 1 teaspoon finely grated lemon zest lemon
1/4 pound (1 stick or 4 ounces) unsalted butter, OR vegan butter, melted
pinch of salt – or use salted butter

Filling:
3 pounds of apples, peeled, cored, and sliced
2-3 tablespoons lemon juice from the lemon you zested for the topping
1/3 to 1/2 cup sugar, depending on the sweetness of the apples
3 tablespoons cornstarch
2 tablespoons flour

  1. Make the crust: measure the flour, salt and sugar into the bowl of your stand mixer (my favorite method), your food processor, or a mixing bowl. Slice the butter and shortening over the top and combine with the flour mixture, using the paddle attachment of the mixer, by pulsing the processor, or using a pastry blender, 2 knives or your fingers, until you have a crumbly mixture with no butter lumps bigger than currants. With the mixer or processor running, or while stirring with fork, drizzle in the water by tablespoons, until the mixture just starts to come together in clumps. Stop before you have one big ball. Turn the crust out onto a floured surface and knead lightly to bring it together. Gather it into a ball, flatten into a disk, wrap (in plastic, wax paper, one of your reusable snack/sandwich bags), and chill for about 30 minutes, and up to 2 days.
  2. When you are ready to bake, heat oven to 375°F.
  3. Make topping: Combine the flour, baking powder, sugars, and lemon zest in a bowl. Stir in the melted butter with a fork until you have formed small and large clumps. Refrigerate or set in the freezer while you make the filling.
  4. Lightly grease a 13 x 9 x 2 baking pan, and then line it with parchment paper, leaving an overhang on the two long sides – it’s OK if the short ends are simply greased.
  5. On a lightly floured surface, roll out the crust into a very large rectangle that’s about 12 x 18. Gently fold the dough in half, and fit it into the baking pan, patting it up the sides. Chill the crust while you prepare the filling.
  6. Make the filling: Toss the fruit, lemon juice juice, sugar, cornstarch, flour, and salt together in a bowl.
  7. Assemble the pie: Spoon the filling into the crust and crumble the topping on evenly. Bake for 45 minutes to one hour until the filling is bubbling and the topping is crispy. Cover woth foil if the topping seems to be browning too fast. Eat warm or room temperature with ice cream or whipped cream on top.

Winter squash and coconut greens galette

This galette combines greens cooked with garlic and coconut milk with roasted winter squash, and (optional) cheese. It’s impressive enough to be the vegetarian – or vegan – offering at your Thanksgiving, but easy enough for a weeknight, especially if you divide up the steps. You can roast the squash a few days before, make the crust, then simply assemble right before baking. You could even put the whole thing together and cover and refrigerate until you’re ready to bake.

Crust:
2 cups flour – proportions can vary; I used 1 1/2 cups unbleached white and 1/2 cup whole wheat
2 teaspoons sugar
a few pinches of salt (if you use unsalted butter)
9 tablespoons dairy or vegan butter
2 tablespoons vegetable shortening
7-8 tablespoons cold water

Filling:
1 small butternut squash (about 1 1/2 pounds), peeled, seeded and cut into slices
1-2 tablespoons of olive oil
1 bunch of greens, leaves only – I used Komatsuna greens; kale, collards or any sturdy greens will work; you’ll need about 3 cups of raw greens
1 tablespoon olive oil
1 large or 2 smaller cloves of garlic, minced or out through a press
1/2 a 14-oz. can of coconut milk
Salt & freshly ground pepper
Optional (to make it vegan) 1 1/2 to 2 cups grated cheese, your choice – I used Gouda, but any good melting cheese will work
Milk or water for brushing the crust when crimping

  1. Make the crust: measure the flour, salt and sugar into the bowl of your stand mixer (my favorite method), your food processor, or a mixing bowl. Slice the butter and shortening over the top and combine with the flour mixture, using the paddle attachment of the mixer, by pulsing the processor, or using a pastry blender, 2 knives or your fingers, until you have a crumbly mixture with no butter lumps bigger than currants. With the mixer or processor running, or while stirring with fork, drizzle in the water by tablespoons, until the mixture just starts to come together in clumps. Stop before you have one big ball. Turn the crust out onto a floured surface and knead lightly to bring it together. Gather it into a ball, flatten into a disk, wrap (in plastic, wax paper, one of your reusable snack/sandwich bags), and chill for about 30 minutes, and up to 2 days.
  2. Roast the squash: heat the oven to 375°. Line a baking sheet with parchment paper or lightly oil, then arrange the squash pieces on top and drizzle a little more oil over the top. Toss to make sure everything is coated, then roast for about 15-20 minutes until the squash gives when poked with a fork. Cool. If you are baking the galette now, you can leave the oven on.
  3. Cook the greens: heat a large pot of water, and when it’s boiling, add the greens and cook a few minutes until wilted. Drain the greens in a colander and run cold water over them to cool. When the greens are cooled enough to handle, squeeze out as much water as you can by taking handfuls and wringing them out as you would a sponge. Place the squeezed greens on a cutting board and chop. Heat 1 tablespoon of olive oil – you can use the same pot you boiled the greens in – and add the greens. Season with salt & pepper and toss to coat with oil. Add the garlic and continue to cook a few minutes until the garlic doesn’t smell raw. Add the coconut milk. If your coconut milk has separated into a large solid lump with liquid underneath, you might want to transfer the contents of the can into a bowl or spouted measuring cup to stir it back together. Otherwise try to get equal arts to coconut solids and liquid into the pot – the solids should melt pretty quickly over the heat. Stir to combine, bring to a boil, reduce heat and simmer until the thickened. When you run a spoon across the bottom of the pan you won’t see liquid under the greens. Cool.
  4. Assemble: Line a large baking sheet with parchment – I used a 14-inch deep pizza pan; a cookie sheet will work, too. On a floured surface, roll out the crust to a rouhgly 16-inch irregular square. Trim the crust to a 14-inch circle (you can put the trimmings on another baking sheet, sprinkle with cinnamon sugar, and bake for a treat). Fold the crust in half and place it on your baking sheet, and unfold. If using cheese, spread about 3/4 of it on the bottom of the crust, then top with the squash, then greens and sprinkle with the last of the cheese. Brush the edges with milk or water, and fold in, crimping every few inches.
  5. Bake at 375° for about 25 minutes until well browned. Serve warm or room temperature.

Caramel Pumpkin (or sweet potato) pie

Based on a recipe from November 2018 Food & Wine, this pie can be made with squash or pumpkin or sweet potato purée
Takes about 45 minutes active time, plus 30 minutes to chill the crust and 45 minutes to bake
Makes 8 big slices

Crust:
1 1/2 cups flour
good pinch salt, unless you’re using salted butter
1 tablespoon sugar
1/2 cup butter, either salted or un- (1 stick, 8 tablespoons)
1 tablespoon vegetable shortening or lard
1 tablespoon sugar
2-4 tablespoons cold water
Special equipment – pie weights or dried beans, parchment paper

Filling:
2 3/4 cups sweet potato puree (roasting the sweet potatoes will give you a drier puree, but steaming also works and is quicker!)
3 large eggs
3/4 cup granulated sugar
3 tablespoons water
2/3 cup heavy cream, warmed
2/3 cup packed dark brown sugar
3 tablespoons unsalted butter
1 teaspoon vanilla extract
a generous pinch of kosher salt
1 1/2 teaspoons ground cinnamon
1/2 teaspoon freshly grated nutmeg
OR use two teaspoons pumpkin pie spice blend, such as Penzey’s

Make the crust: measure the flour, salt and sugar into the bowl of your stand mixer (my favorite method), your food processor, or a mixing bowl. Slice the butter and shortening over the top and combine with the flour mixture, using the paddle attachment of the mixer, by pulsing the processor, or using a pastry blender, 2 knives or your fingers, until you have a crumbly mixture with no butter lumps bigger than currants. With the mixer or processor running, or while stirring with fork, drizzle in the water by tablespoons, until the mixture just starts to come together in clumps. Stop before you have one big ball. Turn the crust out onto a floured surface and knead lightly to bring it together. Gather it into a ball, flatten into a disk, wrap (in plastic, wax paper, one of your reusable snack/sandwich bags), and chill for about 30 minutes, and up to 2 days.

After chilling, roll out the crust and fit it into a deep 9-inch pie plate and trim and crimp the edges. Set it in the freezer or fridge to chill while you make the filling. Cut the trimmings into decorative shapes for the top of your pie, set them on a baking sheet, and chill them, too.

After the crust has chilled, heat the oven to 400°. Line the pie shell with parchment paper, and fill with pie weights or beans. Bake for 16 to 18 minutes. Sprinkle the cutouts with cinnamon sugar, and bake them, too – they’ll brown quickly, so watch carefully! After about 16 minutes, take the shell out, carefully remove paper and weights, and prick the bottom of crust all over with a fork. Return the crust to the oven and bake until bottom is lightly browned, another 4 to 6 minutes. Remove the crust from the oven and let it cool while you make the filling. Reduce the oven temperature to 350°.

Make the filling: Combine the pumpkin puree and the eggs – you’ll get the smoothest filling if you use a food processor, but you can whisk the eggs and potato together in a big bowl, too.

Stir the granulated sugar and 3 tablespoons water together in saucepan much bigger than you think you will need – at least 2 quarts. Cook over medium heat until the sugar melts, about 3 minutes. Increase heat to medium-high and continue cooking, occasionally swirling the saucepan, until mixture is a rich caramel in color, 6 to 7 minutes. Remove from the heat and carefully pour in the warm cream – it will bubble furiously – this is why you need a big pan! Whisk in brown sugar and butter until smooth and incorporated.

Whisk (or pour into the food processor) the warm caramel sauce into the pumpkin & egg mixture, and add the vanilla, salt, cinnamon and nutmeg. Pour the filling into the pie shell and smooth the top. Bake until the filling is just set, about 45 minutes. Decorate the top with your crust cutouts while the pie is still warm – they’ll stick better that way.

Summer 2021 CSA box recipes

Blueberry Buttermilk Pie

I put together two recipes to make this pie – one I thought had too much butter, the other too much sugar. I think I got to a happy medium, although I still want to try reducing the sugar in the filling maybe a bit more (3/4-2/3 cup), to see if there’d be more tang from the buttermilk.

Crust: (a.k.a. Deb’s no fail piecrust)
1 1/2 cups flour
good pinch salt, unless you’re using salted butter
1 tablespoon sugar
1/2 cup butter, either salted or un- (1 stick, 8 tablespoons)
1 tablespoon vegetable shortening or lard
1 tablespoon sugar
2-4 tablespoons cold water

Filling:
1 cup fresh or thawed frozen blueberries (see note*)
3/4 cup flour, divided
1 cup sugar
1/4 cup (1/2 stick) salted butter, melted
3 eggs
1 cup buttermilk
1 teaspoon vanilla
A few grates of fresh nutmeg; about 1/2 teaspoon

Make the crust: measure the flour, salt and sugar into the bowl of your stand mixer (my favorite method), your food processor, or a mixing bowl. Slice the butter and shortening over the top and combine with the flour mixture, using the paddle attachment of the mixer, by pulsing the processor, or using a pastry blender, 2 knives or your fingers, until you have a crumbly mixture with no butter lumps bigger than currants. With the mixer or processor running, or while stirring with  fork, drizzle in the water by tablespoons, until the mixture just starts to come together in clumps. Stop before you have one big ball. Turn the crust out onto a floured surface and knead lightly to bring it together. Gather it into a ball, flatten into a disk, wrap (in plastic, wax paper, one of your reusable snack/sandwich bags), and chill for about an hour, and up to 2 days.

When you’re ready to bake, roll out the crust and fit it into a deep 9-inch pie plate and crimp the edges. Set it in the freezer or fridge to chill while you make the filling.

Heat the oven to 425° with a rack in the bottom third. Place a baking sheet or pizza pan large enough to hold the pie and catch drips on the rack, and let it get hot too.

Make the filling: Toss the blueberries with 1/4 cup flour. Combine the remaining 1/2 flour and sugar in a bowl, and whisk in the melted butter. Whisk in the eggs, one at a time, mixing well after each egg. Pour in the buttermilk and vanilla, and grate in the nutmeg. Pour the filling into the crust – it helps to take it out of the freezer, first <grin>.  Sprinkle the blueberries on top. Place the pie on the preheated baking sheet, close up the oven, and bake for 10 minutes. Reduce the heat to 350º, and bake for about 25 minutes until the filling is set.

*note: Usually when you thaw frozen blueberries you get a lot of blue juice that really dyes the dish. I tried the thaw-the-berries-in-a-strainer trick, and that worked great. I was surprised how luscious the frozen berries were baked in the filling!

Roman-style cheese tart

Crust:

  • 1 1/2 cups unbleached white flour
  • 1/3 cup sugar
  • pinch of kosher salt
  • 1/2 teaspoon baking powder
  • 8 tablespoons, 1 stick, 4 oz., softened unsalted butter
  • 1 large egg lightly beaten

Filling:

  • 3 ounces cream cheese, softened
  • 1/4 cup sugar
  • 1 tablespoon dark rum or 2 teaspoons vanilla
  • 1 large egg yolk
  • 1 cup whole milk ricotta cheese

Make the crust:

Mix the flour, sugar, salt, and baking powder in a large bowl. Blend in the butter until it looks like crumbs. Mix the beaten egg in with a fork until you have a soft dough. Pat the dough into the bottom and up the sides of a 9-inch tart tin with removeable bottom. Chill for 30 minutes.

Make the filling:

Mix the cream cheese, sugar, and rum or vanilla. Add the egg yolk and ricotta and mix well.

Bake the pie: 

Heat the oven to 350°. Pour the cheese filling into the crust. Bake for 45 minutes or until puffed and brown. Cool on a rack for 10 minutes, or until cool enough to handle, and then remove the outer rim of the tart tin. Serve at room temperature or slightly chilled. Refrigerate any leftovers.

For Orange Tree Imports cooking class