Stove Top Mac & Cheese

Not that I would ever abandon my standard baked mac & cheese, but sometimes you want a creamy stove top version. It’s become one of those sort of full circle things in my life, that when my kids were little of course they wanted box mac & cheese, not home made – although we had all natural Annie’s, rather than Kraft – but as they got older, they started liking mine, and now not only does my older son make his own version of my mac & cheese, he’s shared the recipe with all his friends, too.

I first tried a stove top mac that was too sauce-y, too much roux and thick sauce to noodle, so I was interested to try this recipe since it had less roux and you add a measured amount of water, then the milk, then the dry pasta, and cook it until the noodles are done and have soaked up all the water. Then you add the cheese.

Ingredients (for 4 servings):

  • 1 tablespoon butter
  • 1 tablespoon flour
  • 1 cup warm water
  • 1 3/4 cups milk, warmed
  • 1/2 pound macaroni or pasta of your choice
  • 1 teaspoon salt
  • 2 1/2 cups shredded cheese – again your choice – when I tested this recipe I used white cheddar, Swiss, a kind of spicey smoked cheddar with a bit of chipotle, and Parmesan
  • Additional salt & pepper to taste, and you can play around with the seasoning – I often put in a bit of nutmeg, and dry or prepared mustard, and some hot seasonings like cayenne would not be out of place

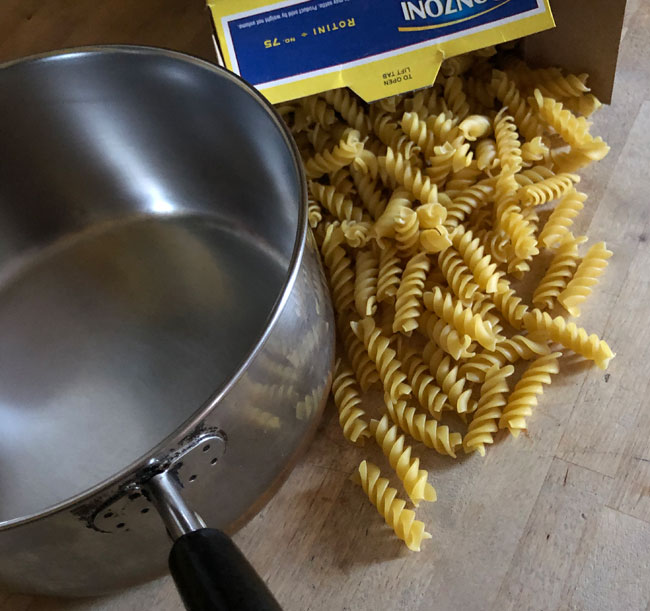
Melt the butter in a heavy bottomed sauce pan that holds at least 2 quarts. Add the flour and blend, then whisk in the water, and then the milk. Add the dry pasta and the salt. Bring to a simmer, then partially cover and cook for 8-10 minutes until the pasta is cooked and liquid is mostly absorbed. Uncover and add the grated cheese and any additional seasonings. Stir well and serve.

Originally posted January 2019

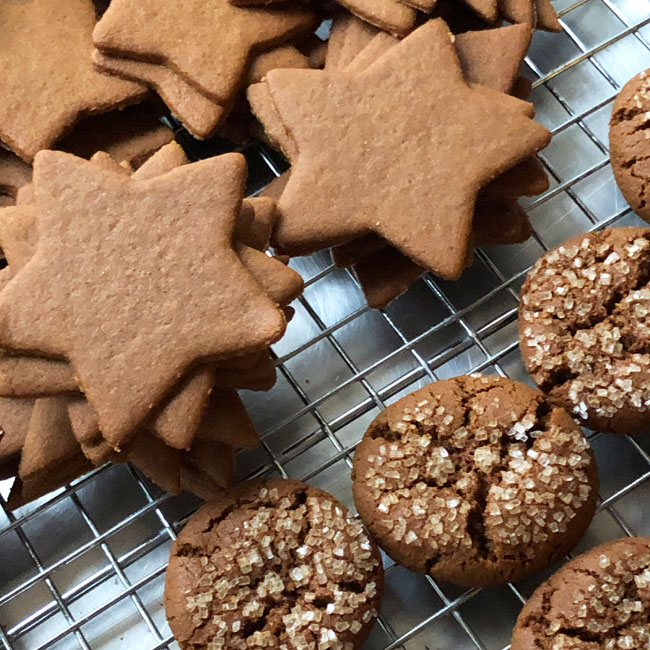
Moravian Ginger Thins & Snaps

This recipe is based on the one in  Beranbaum, Rose Levy. 1998. Rose’s Christmas cookies. New York: Morrow., where it is called “Grandmother Schorr’s Moravian Spice Crisps”

  • 1 1/3 cups flour
  • 1 1/4 teaspoons baking soda
  • 3/4 teaspoon cinnamon
  • 1 teaspoon ground ginger
  • 1/2 teaspoon ground cloves
  • 1/3 cup vegetable shortening (I have had best results with Crisco)
  • 1/3 cup light brown sugar
  • 1/2 cup molasses (like Grandma’s; not blackstrap)

Combine the dry ingredients – first 5. Cream shortening and sugar, then add molasses. This can be done in a mixer, food processor, or with a wooden spoon. Mix in the dry ingredients until you have a soft dough with no spots of dry flour. Gather the dough into a ball, and either wrap in plastic wrap, or place in a small bowl and cover. Allow the dough to rest at cool room temperature at least overnight or up to 3 days.

Lightly grease several cookie sheets and heat the oven to 325° Divide the dough in half. Roll out the first half as thin as possible – I like to use a floured pastry cloth. Cut into desired shapes using cookie cutters – about 2 1/2 in. to 3 in. is a good size.

Arrange the cookies on sheets and bake 8-10 minutes, until golden brown. Be careful because if they burn they will be bitter. They will still be a bit soft when you take them out of the oven but with crisp as they cool.

Collect the scraps and re-roll and cut once.

For the gingersnaps, gather the remaining dough into a ball or a log, and divide into small cookies – scant tablespoons. Brush the tops with water, and sprinkle with coarse sugar. Bake on the same trays until deeply cracked.

** If you are a gingersnap lover, you can skip the rolling and cutting and shape all the dough into balls for snaps.

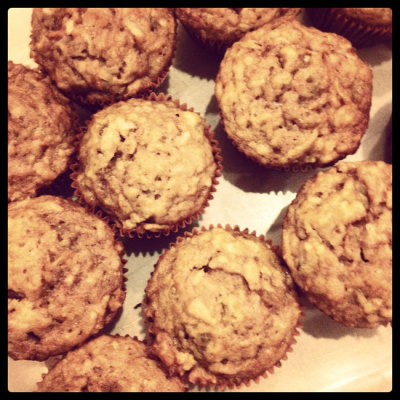
Morning Glory Muffins

Obviously this picture was taken when I was in my enchanted-with-Instagram-filters-phase, which Insta tells me was October 26th, 2014.

Anyways this is my version of the notorious – at least for a time in probably the 1980s – Morning Glory Muffins. The most delicious versions are fairly high in sugar and fat. There are also lowfat healthier and less-tasty versions.

My version is a compromise.

Makes 12-14 muffins

  • 1/2-3/4 cup raisons – brown or yellow – or use King Arthur fruit cake blend, with yellow raisons, currants, diced pineapple, cranberries, and dates
  • 2 large eggs
  • 1 cup brown sugar
  • 2/3 cup vegetable oil OR 10 tablespoons of melted butter
  • 2 cups grated carrots – I like them peeled before grating
  • 1 large apple, peeled or un-peeled, grated or diced
  • 1/3-1/2 cup nuts – toasted walnuts are very nice
  • 1/2 cup coconut – I prefer sweetened, but unsweetened works
  • 1/2 cup yogurt (vanilla or plain) or buttermilk or a combination, or the non-dairy milk or yogurt of your choice
  • 1 teaspoon baking powder
  • 1 teaspoon baking soda
  • 2 teaspoons cinnamon
  • 2 teaspoons vanilla
  • good-sized pinch of Kosher salt
  • 2 cups of unbleached flour OR 1 cup unbleached flour and 1 cup whole wheat flour OR 1 1/2 cups unbleached flour and 1/2 cup wheat germ or bran cereal

Heat the oven to 375° and grease a 12-well muffin tin, or line it with paper liners. You may need an extra custard cup or silcone pan or two.

Optional – Put the raisons into a small heat proof bowl, and pour boiling water over to soften them.

In a large bowl, beat the eggs, and add the sugar and oil.

Add the carrots, apples, nuts, and coconut, and mix.

Stir in the yogurt.

Measure the baking powder and soda and vanilla into the bowl, add the salt, and give it a stir.

Add the flour, and drain the raisins and add them, and fold it all together until there are no dry spots.

Scoop the batter into the prepared pan(s), and bake for about 25-30 minutes until they’re raised and firm.

Eat plain, or with butter or cream cheese and/or honey. These muffins are known as grab & go car food, but I prefer to eat them seated, even at my desk.

Adapted from a recipe written on the back of a notebook I had in library school (1989-1991) that John, aged two or three, scribbled on

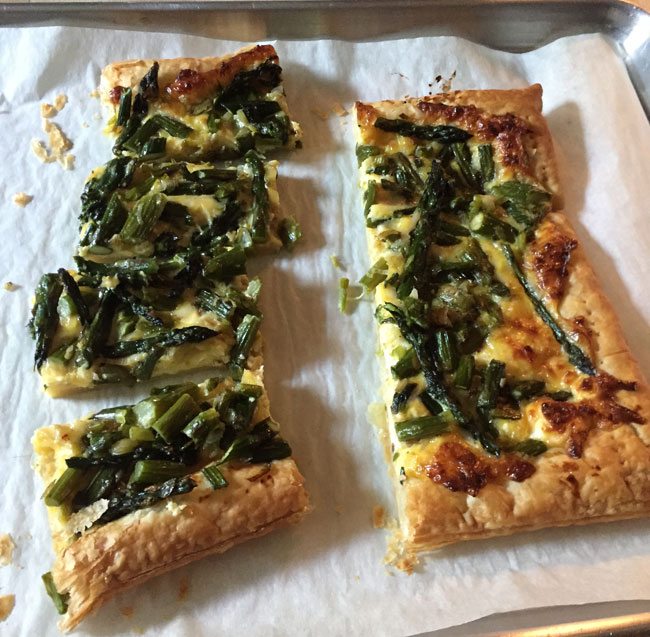
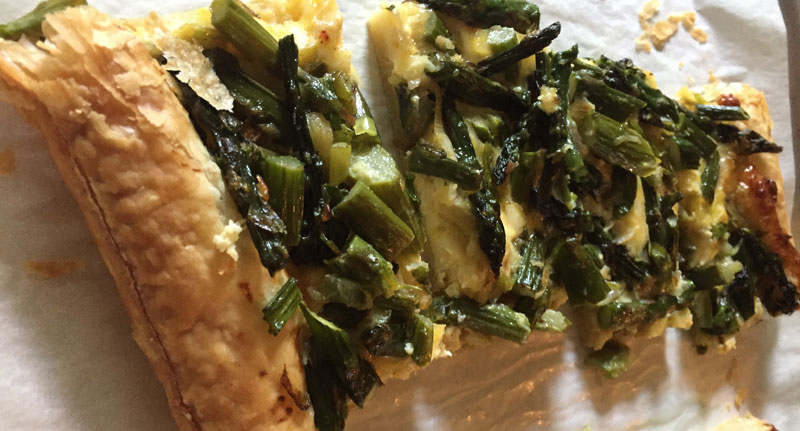
Asparagus & cheese tart on puff pastry

Based on this recipe from Food Network

  • 1 sheet frozen puff pastry, 1/2 package (17.3 ounces), thawed
  • 3/4 pound asparagus, rinsed, dried, and chopped into 1-inch lengths (tips a little longer, maybe)
  • 1 large scallion, cleaned and thinly sliced
  • 1 stalk of green garlic, cleaned and thinly sliced
  • small glug – about 2 teaspoons – olive oil
  • a few grates of nutmeg
  • Kosher salt and ground white pepper
  • approximately 2 cups grated cheese – this recipe is good for using up cheese ends. I used white cheddar, Gouda with fenugreek, Jarlsberg, and a lump of plain soft goat
  • the Food Network recipe calls for 3 tablespoons whole milk – I left that out due to the goat cheese, but would probably add milk or cream or half & half or buttermilk, if no goat
  • 2 egg yolks from large eggs
  • the Food Network recipe says to top with freshly grated lemon zest – I think that would be delicious, but I forgot

Heat the oven to 400° Roll out the puff pastry into a 10-by-16-inch rectangle on a floured surface. Transfer it to a parchment-lined baking sheet and prick all over with a fork. Bake until light brown all over, about 12 minutes. Remove it from the oven, but leave the oven on.

Add the olive oil to a skillet and heat over medium high heat. Add the asparagus, toss to coat with oil, add the scallion and green garlic, and stir to combine. Put a small amount of water – about a tablespoon – into a lid that fits the skillet. Pour the water into the skillet, cover and cook for about 5 minutes, until the asparagus is tender and bright green. Remove the lid and add the nutmeg and salt and pepper, and toss a bit over the heat to evaporate any remaining water.

Combine the cheeses and the egg yolks in a bowl, and stir with a fork until you have a fairly unified mixture. Dollop this onto the pastry, and spread it out to within an inch of the edge. Top with the asparagus, and return the tart to the oven. Bake for another 10 to 15 minutes, until the cheese mixture is puffy and congealed and the crust is nicely browned. Eat warm or at room temperature.

Makes about 6 breakfast servings; probably 10-12 appetizer-size.

Posted June 2018

Victoria Sponge, or Dad’s Day Cake

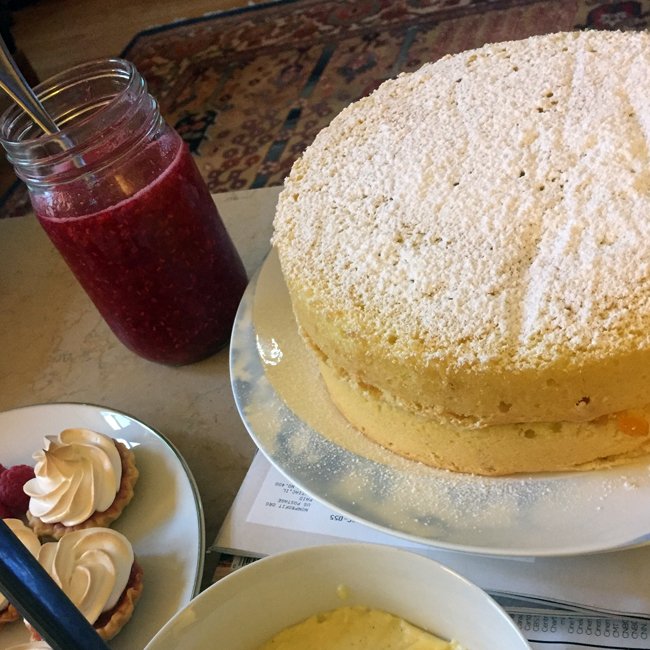
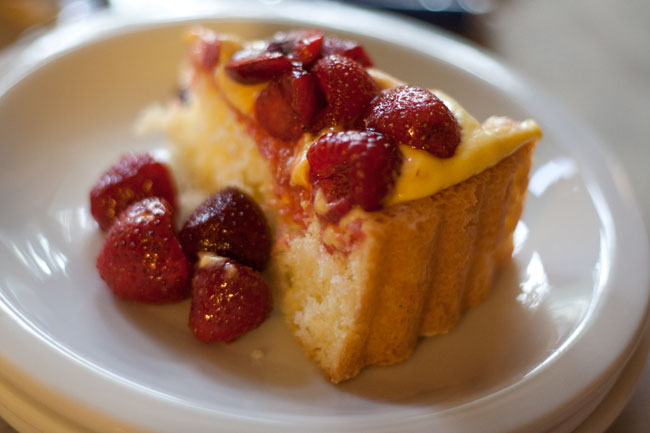
This recipe is from Michael Smith’s The Afternoon Tea Book, that I first encountered in our library when I worked at Pleasant Company. The book was already on the old side, originally published in the late ’80s,  even then, in the mid-90s, but looks like you can still get a used copy on Amazon, which is what I did. It’s a terribly reliable source for all things British. The secret trick to the cake is using whipped butter.

I made a Victoria sponge to eat with custard and raspberry sauce, while watching the royal wedding, Prince Harry and Meghan Markle, on May 19, 2018. I thought I’d write it up, only to find not only have I been making this cake for various occasions dating back at least 6 years, I already wrote up the recipe, as a father’s day cake I made for Mark in 2012, and there’s a blog post about it, too.

Not only that, I made a half batch of pastry cream to go with the 2018 cake, and that’s just what I did in 2012, as well.
Cake:

  • 2 cups cake flour (I like King Arthur Guinevere – unbleached)
  • 4 1/2 teaspoons baking powder
  • 4 large eggs
  • 1/4 cup warm water
  • 1 cup white sugar
  • 1 cup whipped butter, softened (I like Land O’Lakes)
  • pinch of salt – or use salted butter

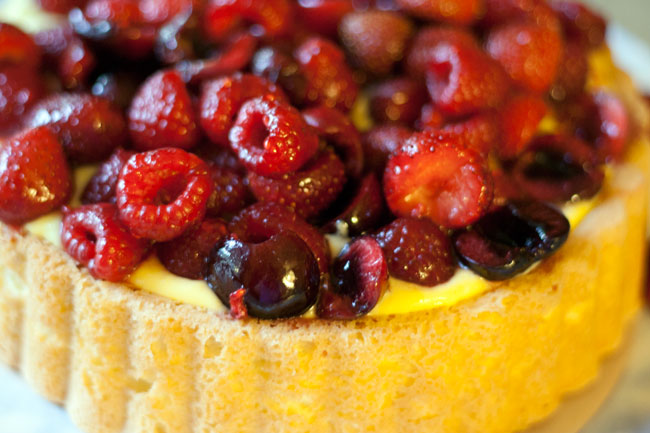
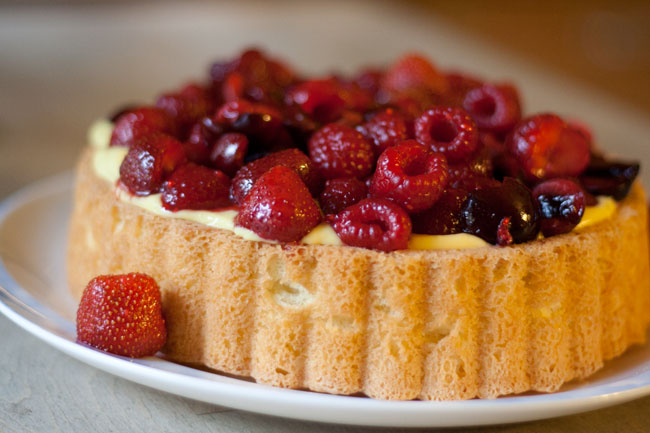
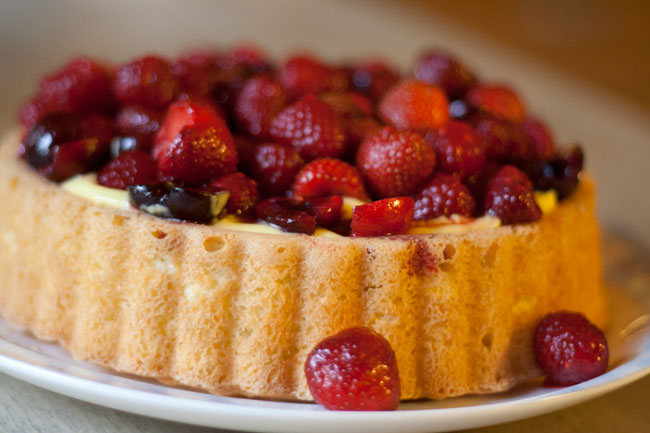
Heat the oven to 325°. Grease, line the bottoms with a round of wax or parchment paper, grease the paper, and lightly flour two 8-inch or 9-inch cakes pans (if you use 8s, make sure they are at least 2 inches deep). Or grease and lightly flour a cake pan with a depression for filling, like a Maryann pan (you’ll have extra batter to bake in a plain pan). I got mine from King Arthur, but looks like they only carry mini Maryanns now.

Sift the flour and baking powder together. In an electric mixer with the whisk beater, beat the butter and sugar till well creamed. Add the eggs, one at a time. Add the flour and water, and the salt, if using, and continue to beat until the mixture is lighter in color and glossy (about 3 minutes). Turn into the prepared pans, and bake for 20 – 25 minutes, until just lightly browned, puffed, and firm. Cool in the pans for 10 minutes, then run a thin knife around the edges and un-mold onto a cooling rack or serving plate.

Pastry cream:

  • 1 cup of half & half
  • 4 tablespoons of granulated sugar, or, if you are out, use light brown sugar for a lightly caramel cream
  • pinch of salt (or again use salted butter)
  • 3 egg yolks, as much chalazae removed as possible – you can kind of squeeze them off with your fingers when you separate the whites and yolks.
  • 1 tablespoons cornstarch
  • 2 tablespoons unsalted (or salted, but leave out the pinch of salt)
  • 1 teaspoon vanilla extract, or vanilla been paste

Combine the half & half and and 3 tablespoons sugar in a saucepan, add the salt if using, and heat until steaming, stirring to dissolve the sugar. Meanwhile whisk the egg yolks, remaining sugar, and cornstarch together in a 2 cup spouted glass measuring cup. Pour the hot half & half into the yolk-sugar mixture, whisking, and transfer the mixture back to the saucepan over the heat. Cook, stirring with a metal spoon, until thickened. Don’t boil, but a few large bubbles should form on the surface. Whisk if necessary to prevent lumps. Remove from the heat, and add the butter and and vanilla. Mix in the pot until the butter is melted, then scrape into a bowl, and place a piece of plastic wrap or wax paper directly on to the top of the cream. Refrigerate until cold before using – at least 3 hours and up to 48 hours.

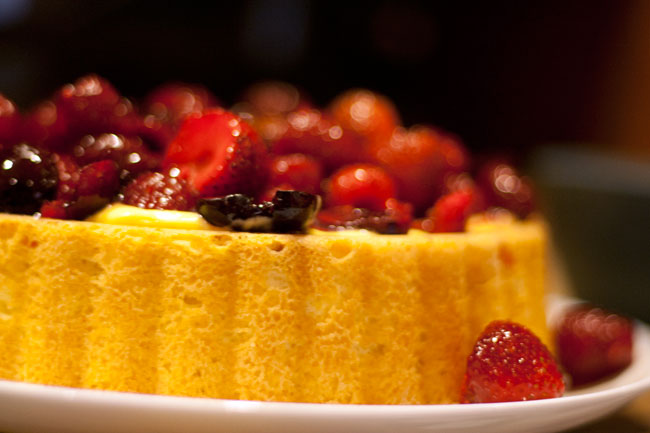
Assembly – about 3 cups of mixed fruit – I used raspberries, strawberries, and cherries. Cut the fruit into bite-size pieces, remove hulls and pits. Add 1/4 cup to 1/3 cup sugar, mix, and let macerate at room temperature until the cake is cooled. Spread the pastry cream in the depression in the Maryann cake (Freeze the extra layer for later). Top with the fruit. Eat as is, or with ice cream or whipped cream.

For a more traditional approach, sandwich the two layers with jam, raspberry or strawberry preferred.

Originally posted in 2012, somewhat updated in 2018
Apricot & White Chocolate Chip Scones

Mark and I split an apricot & white chocolate scone at Colectivo a few Saturdays ago. It was good, but we agreed that we’d have preferred a scone with lots of chopped apricots, like theirs had, but instead of a white frosting that didn’t taste particularly of white chocolate, white chocolate chips IN the scone would be better.

So I made some on Sunday morning.

They’re a little bit like this King Arthur Flour recipe, but less butter and cream cheese, more like my cinnamon scone recipe.

3 cups unbleached flour
1/3 cup sugar
pinch salt
2 tsp. baking powder
1 tsp. baking soda
4 tablespoons butter (half a stick)
4 oz. cream cheese (half an 8 oz. bar)
1 egg
about 2/3 cup buttermilk
1 teaspoon vanilla extract
1/2 teaspoon almond extract
1 cup dried apricots, chopped
3/4 cup white chocolate chips
a little extra buttermilk for brushing the tops, and coarse or granulated sugar for sprinkling on top

Heat the oven to 400°.

Place the flour, sugar, salt, baking powder and baking soda in the work bowl of a food processor, or your stand mixer, or a mixing bowl. Pulse 2-3 times, or stir a bit, to blend the dry ingredients. Slice the butter and cream cheese into chunks and put them on top of the flour. If using a food processor, pulse; mix with the paddle blade of the mixer; or use a pastry blender to cut the butter & cream cheese into the flour until the mixture looks like coarse meal.

If using a food processor, dump the mixture into a mixing bowl. If using a mixer remove the bowl, and if you’re blending by hand you’re all set. Add the apricots and chocolate chips to the flour mixture, and toss together.

Break the egg into a 1 cup measure with a spout, beat with a fork, and add enough buttermilk milk to make 1 cup. Add the extracts to the egg and buttermilk milk and pour the liquid into the bowl. Mix with a fork, and keep stirring until it clumps, and there are no pockets of dry flour, adding extra buttermilk or water as necessary.

Turn the dough out onto a lightly floured surface, and knead until you have a homogeneous dough. Divide the dough in half, and flatten each half into a disk. Brush the top of the disks with a little more buttermilk, and sprinkle with sugar. Use a knife to divide each disk into 6 wedges and place on an ungreased baking sheet, and bake until firm and nicely browned – about 20 minutes. You can also make the dough into one bigger disk for 8 larger scones, but I like the small ones.

Originally posted in 2018 – but the picture is from 2012, and the cinnamon scone recipe is from the ’90s – so I’ve obviously been baking scones for a long time

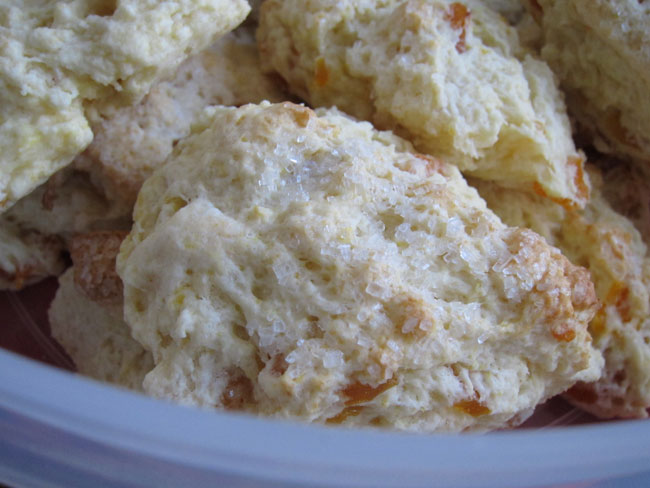
Apricot Scones. It doesn’t look as if these have any white chocolate in them.

Kaffee Keksee = Coffee Biscuits

Thanks to Lisbeth, and Molly, for this recipe.

Ingredients:

  • Dough:
  • 125 g (1 stick plus 1 tablespoon) cold, unsalted, butter
  • ⅔ cup granulated sugar
  • Pinch of kosher salt
  • 2½ cups unbleached flour
  • ½ teaspoon cinnamon
  • ½ tsp cardamom
  • 1 teaspoon vanilla or vanilla bean paste
  • 1 egg
  • Coffee ganache filling:
  • ½ cup heavy cream
  • 4.25 ounces of good dark chocolate, like Scharffen Berger, finely chopped
  • 1 shot of brewed espresso (or 2 teaspoons espresso powder dissolved in a shot glass of water)

Assembly:

Make dough:
Combine the butter, sugar, salt, flour, and spices in a food processor. Pulse until the mixture resembles fine meal. Mix the egg and the vanilla, pour the mixture into the food processor on top, and pulse until you have a dough. Form the dough into a disk and wrap in wax paper. Chill it for at least 30 minutes and up to overnight.

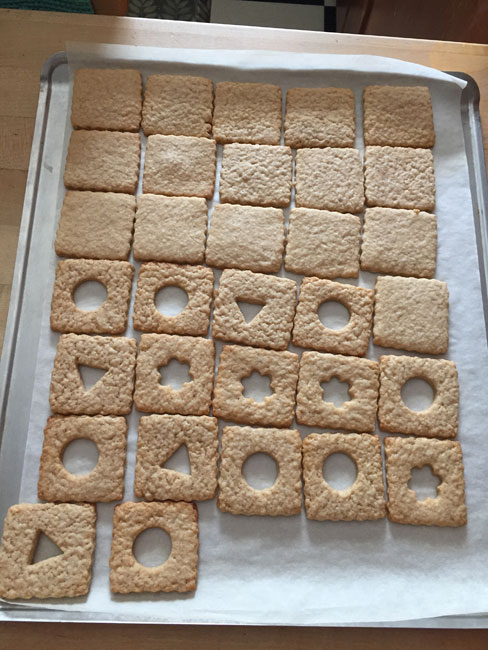
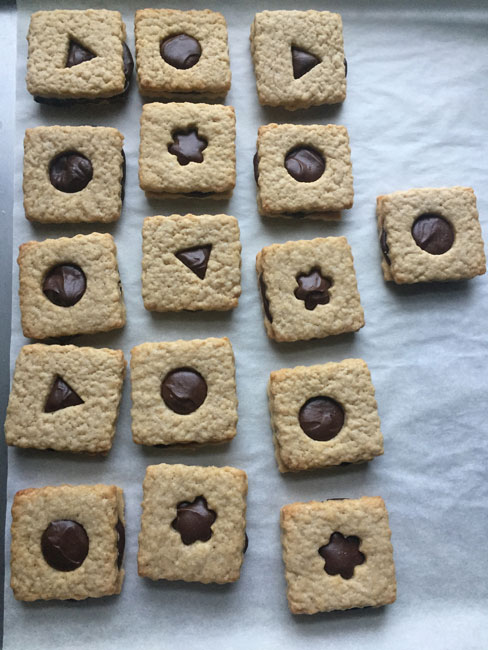
Heat the oven to 375°. Line one or two large baking sheets with parchment. Roll out the dough on a floured work surface; don’t make it too thin. Cut the dough into shapes with a 2-3 inch cutter. Cut out a shape from the center of half the cookies – Lisbeth used a moose; I used circles and diamonds, and a few flowers.

Place the cookies on the sheets and bake for 8 – 10 minutes.

Cool completely – about two hours or overnight.

Make coffee ganache filling:

In a saucepan, bring the cream to a boil with the espresso. Add the chopped chocolate and let it rest for a few minutes, then mix until smooth. Cool until it’s thick enough to spread – you can put the pan into a bowl of ice water and stir until the filling is the right consistency, if you are impatient like me.

Optionally, dust the top cookies with cocoa or powdered sugar.  Place a generous smear (2-3 teaspoons) of ganache filling on the underside of the cookies without cutouts, place a cutout cookie on top, press gently, and let set for at least two hours to firm up.

The cookies will keep in a covered container at room temperature for at least a week.

Originally posted – NEW in 2018

My version of Farm Cakes

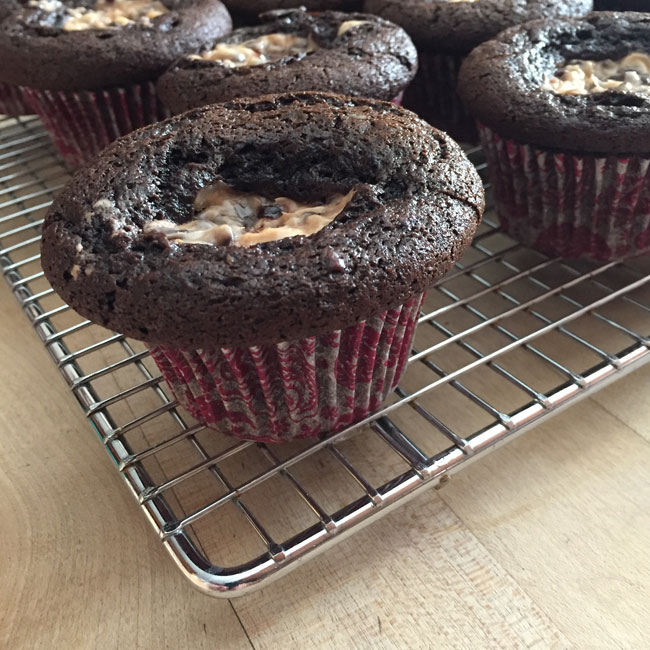
The Ovens of Brittany bakery used to sell a chocolate muffin/cupcake with a cream cheese and chocolate chips stuffing, and they were called Farm Cakes. For a while in the 1980s, one of the Ovens bakers managed the bakery at one of the Steep & Brew Coffee cafes, and they sold them, too.

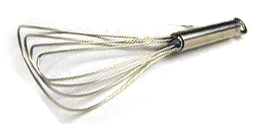
Here’s my version of Farm Cakes, using a hand mixed, mayo-for-shortening, chocolate cake. The best thing to use to mix up the batter is the type of flat whisk shown below – it’s for angel cake, to fold the egg whites in, but it’s also a good all-purpose mixer.

Cake:

2 cups sugar
1 cup unsweetened cocoa
1 cup cold coffee (can use decaf)
2 eggs, 1 separated
1 tsp vanilla
1/2 tsp almond extract
2 tsp. baking soda
1/2 tsp. salt
2 cups flour
1 cup mayo (can use reduced fat)

Combine the sugar and cocoa in a large bowl. Stir the extracts into the coffee, then add about half the coffee mixture to the sugar and cocoa, and mix until smooth. Add the rest of the coffee. Beat in one whole egg and the white of the separated egg, add the mayo, beat till smooth, and then measure the baking soda and salt onto the top of the mixture in your bowl. Pour the flour on top, and mix well.

Filling:
2/3 of an 8-oz. bar of cream cheese (about 6 oz.), softened
2/3 cup of mini chocolate chips
1 egg yolk
A few drops of almond extract (optional)

Place the cream cheese in a bowl, add the chocolate chips, egg yolk, and extract if you’re using it. Mash together.

Preheat the oven to 350°. Line about 18 wells in two muffin pans with paper liners. Fill muffin cups 3/4 full. Drop about 2 tsp of filling into each muffin. Bake for 25-30 minutes, until firm.

Note: It might be wise to grease the tops of your muffin tins, or be sure to loosen the cakes when they are still warm, because in testing these in 2018, using these amounts of batter and filling, I got 20 cakes with significant muffin tops! That is batter that spread over the tops and could stick to the tin.

Originally posted around 2010; based on a recipe from the 1980s

Farm Cake with muffin top

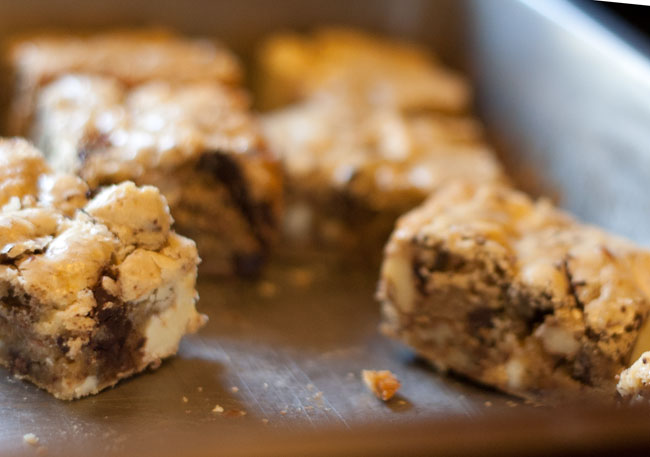
Lime & white chocolate blondies

1/2 cup butter or vegetable shortening
2 cups brown sugar, lightly packed
2 large eggs
2 teaspoons vanilla extract
1/2 teaspoon salt
1 3/4 cup unbleached all-purpose flour
2 teaspoons baking powder
12 – 15 oz. white chocolate coarsely chopped – or 1 1/2 – 2 cups white chocolate chips
2 – 3 oz. unsweetened chocolate finely chopped
1 cup diced toasted pecans
grated zest and juice of one lime

Lightly grease a 9 x 13-inch pan and preheat your oven to 350°F. Melt the butter in a medium-sized saucepan. Add the brown sugar, and stir until the mixture is smooth.

Remove the pan from the heat, pour the butter-sugar mixture into a medium-sized bowl, and allow it to cool to lukewarm. Whisk in the eggs one at a time. Stir in the vanilla extract, salt, and baking powder.

Measure the flour into the bowl, top with the chopped chocolates and nuts, and stir to combine. Finally, fold in the lime zest and juice.

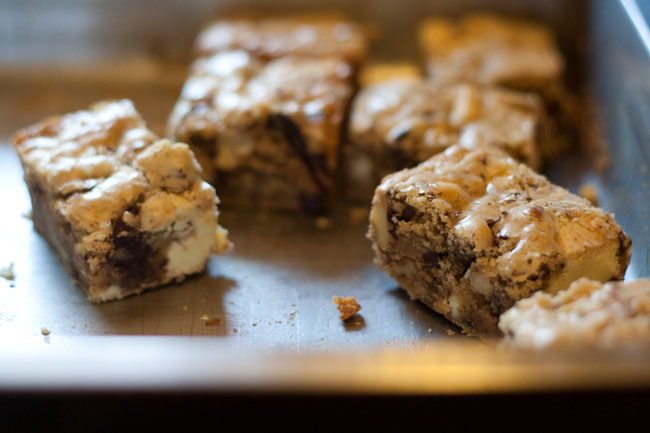
Spread the mixture evenly in the pan, and bake the blondies for 30 to 35 minutes, until they’re light brown on the edges and top. Yield: about 2 dozen 2-inch squares, but you can cut them smaller.

Originally posted April 2013

Blueberry Muffins

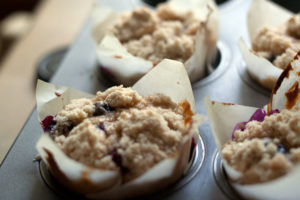
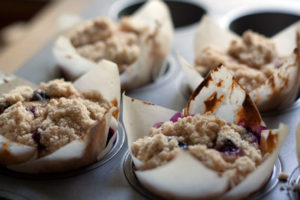
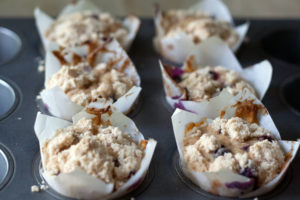
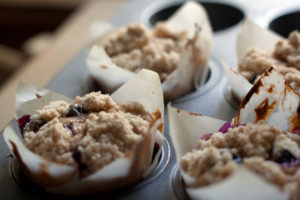
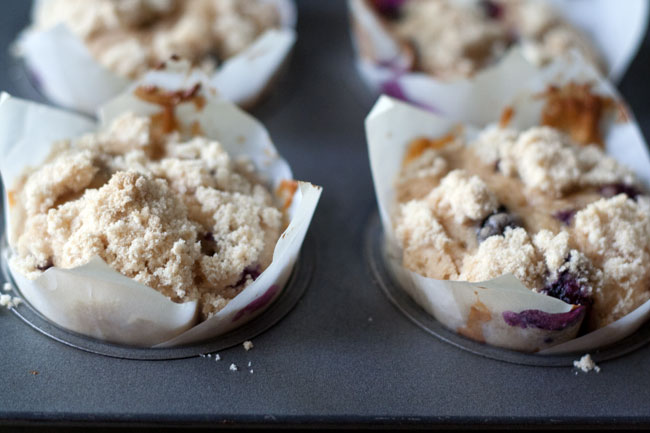
We had an AFS student from Germany the 2013-14 school year, and her parents and little sister came to pick her up in July. They’ll travel for about 2 weeks in the US before going home. Their last morning here, I made blueberry muffins for breakfast. They asked for the recipe, and it made me realize I have never really done my blueberry muffin recipe. It’s changed over the years influenced by this and this, but usually with butter rather than oil, and cinnamon, and the crumbcake method, of cutting the butter in first, a little richer than my “everyday” muffins.

And now, 10 years later (January 2024) I tried out a whole wheat version that is proving quite popular.

Ingredients:

  • 2 1/2 cups of flour
  • 1 cup granulated sugar
  • 1 tsp salt
  • 2 tsp. baking powder
  • 1 tsp. cinnamon
  • 1 stick, 8 TBLS, 4 oz. butter
  • 1 egg
  • 1 cup 2% milk
  • 2 cups blueberries, fresh or UN-thawed frozen (1 pint basket)

Heat the oven to 375°. Grease the wells of a 12-well muffin tin, or line with paper liners. Measure the flour, sugar, salt, baking powder, and cinnamon into a large mixing bowl – or the bowl of your stand mixer. Slice in the butter. Cut the butter into the flour mixture, with the paddle attachment of your mixer, or a pastry blender, or your fingers, until you have what looks like coarse meal. Remove 12 TBLS about 8 TBLS – half a cup – of the crumbs and set aside for topping. Make a well in the center for the dry ingredients, and break in the egg, and our in the milk. If you were using the mixer before, do this part by hand with a rubber (silicone, really, probably) spatula. When all the dry goods are wetted down, add the blueberries, and mix gently just till everything is combined. Scoop the batter into the muffin tin, dividing evenly (A muffin scoop is great for this). Top each muffin with a sprinkle of the reserved crumbs. Bake 15 – 20 minutes until raised, firm and lightly browned.

Originally published June 2014 – edited Feb. 2019