Lottie’s Carrot Breakfast Muffins

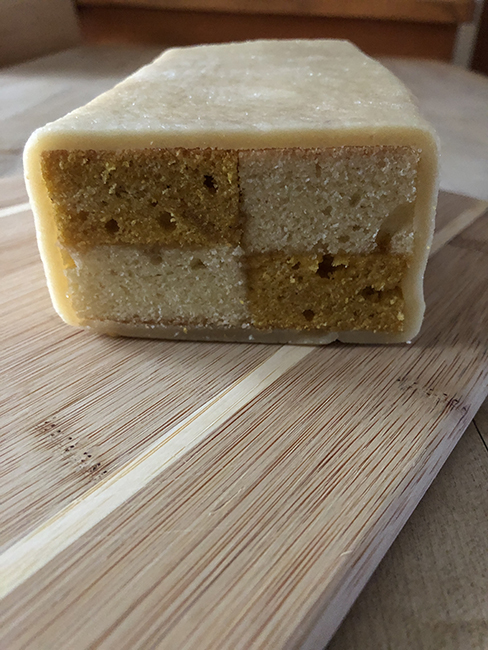
This recipe is adapted from an original by Lottie Bedlow, @lottiegotcake who was a contestant on the Great British Bake Off in 2020, series 11 in the UK, series 8 in the US. The contestants had to live in a pandemic bubble. And oh gosh, I was inspired to make Battenberg cake by that series. Lottie’s had rhubarb; mine was pumpkin.

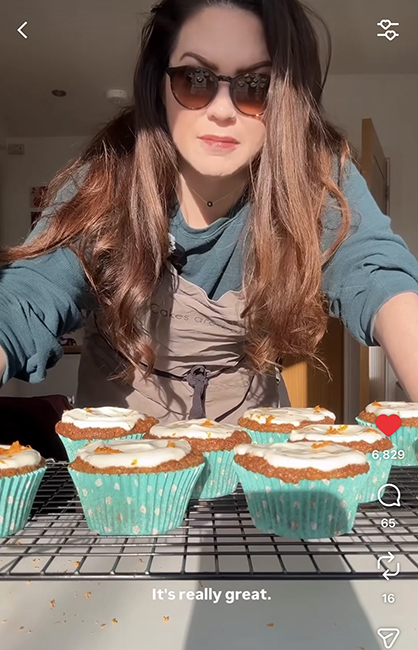
Anyways, the carrot muffins. Lottie says they are accidentally one of the best things she made in 2025.

Yogurt topped carrot muffins

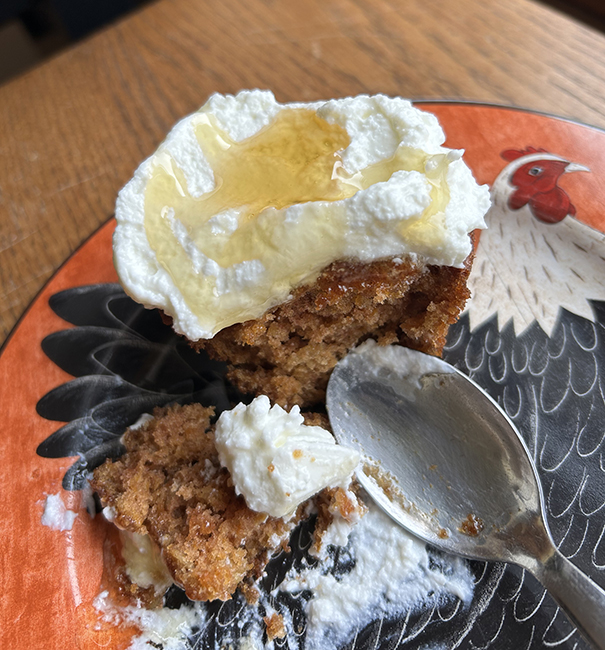
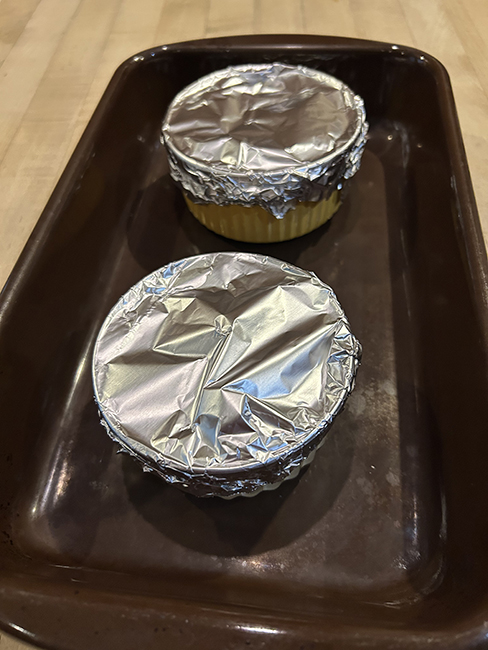
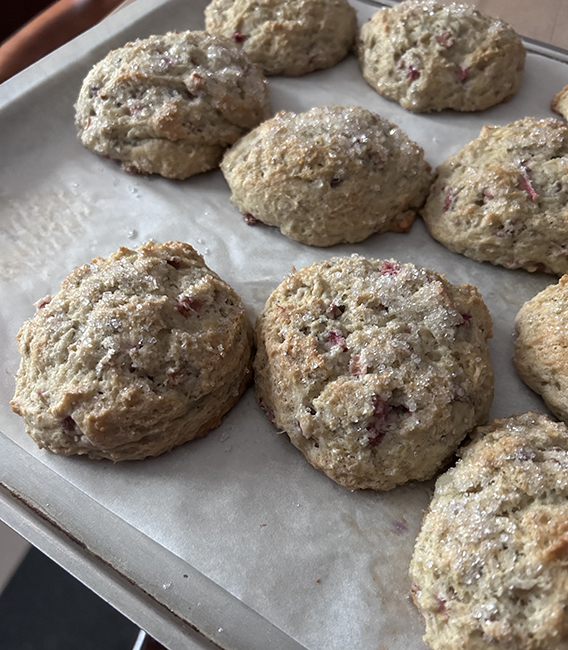
I actually made them twice, once with eggs and once with applesauce replacing the eggs. The egg ones got a little too dark, because as Lottie points out, some of the muffins have a little dip in the top – that she filled with yogurt. I thought the dip was because in Lottie’s recipe, the muffins bake at 160°C, with the fan on. I calculated that to be 320°F, and I thought maybe that coolish temperature was what made the dip; if the oven was hotter I thought they’d get that initial spring.  But turning the oven up to 375° for the last few minutes just resulted in darker muffins. Oh well. The applesauce ones that cooked at 375°F no fan were still a little flat on top, too. It’s just how they are.

Makes 9 muffins
Ingredients:
1/2 to 2/3 cup light brown sugar (optionally use more sugar if your applesauce is unsweetened)
1 cup grated carrots, 2-3 smallish carrots, I like to peel them but it’s not necessary
2 eggs OR 1/2 cup sweetened or unsweetened applesauce
1/2 cup neutral oil, such as safflower or canola
grated zest of one orange
1/2 cup rolled oats
1 1/4 cups unbleached flour
1/2 teaspoon baking soda
1 teaspoon baking powder
1 teaspoon cinnamon
1 teaspoon ginger
good pinch salt

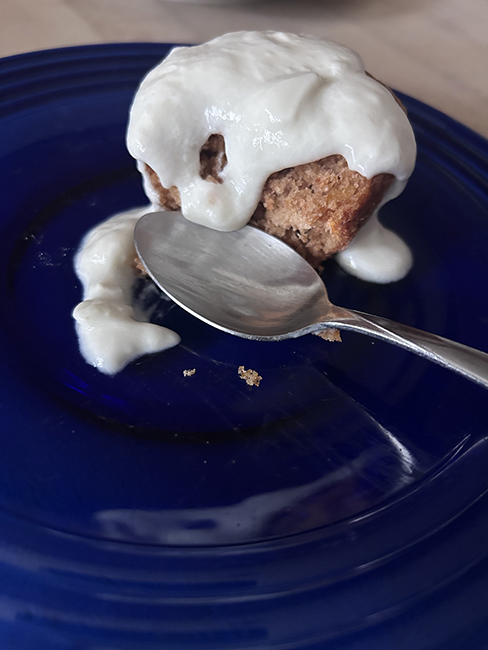
Optional topping: Full fat Greek yogurt, sweetened with a bit of agave ( I used honey), a bit of vanilla or vanilla bean paste, and grated orange zest

Heat the oven to 375° and line 9 cups in a 12-well muffin tin with paper liners, or grease the wells. Measure the brown sugar into a medium bowl and grate carrots on top. Beat in the eggs, then pour in oil and mix well. Grate the orange zest into the bowl give it another stir and set aside. Whisk together the dry ingredients in another bowl. Add the wet ingredients and combine. Scoop the batter into the muffin tin, and back for 18-20 minutes, till firm.

Serve with Lottie’s topping, or just spoon a little yogurt over and enjoy.


Crème Caramel

With a hat tip to Nigella Lawson’s crème caramel for one. I edited slightly to make it for two. This recipe makes two generous crème’s, about a half cup each. I usually like to have a daylight picture, but since I made this December 28th, my Dad’s 105th birthday (tho he is not here to celebrate) and since the crème had to chill before being turned out of the ramekins which happened after dark on a short December day, and since we ate them all up right away,  artificial light pics will have to do.

Special equipment: two ramekins or small glass canning jars that hold at least 7 liquid ounces

For the caramel:
1/4 cup granulated sugar
4 teaspoons water

For the custard:
1 cup whole milk
1/3 cup heavy cream
4 teaspoons sugar (or one heaping tablespoon)
2 large egg yolks
1 large egg
1 teaspoon vanilla

To make the caramel, combine the sugar and water in a small sauce pan with a heavy bottom. Place over medium-high eat and, in the words of Bronwen Wyatt,  gently move the sugar around for a few minutes until it’s dissolved. Don’t stir after that although you can swirl the pan as needed to keep it cooking evenly. Let the caramel start bubbling and lower the heat as necessary and watch closely until it’s a nice golden caramel color. This can happen quite quickly with such a small amount of caramel. When it’s a good color, carefully pour half into each of your ramekins and tilt them to cover the bottoms. Don’t wash the pan yet.

Heat the oven to 300°. Locate a roasting pan that will hold the two ramekins. Boil a kettle of water.

For the custard, combine the milk and cream and heat until steaming but not boiling in the saucepan that you used for caramel. This will melt any remaining caramel that was stuck to the pan into the milk, to give it more caramel flavor. While the milk heats, combine the egg, egg yolks, and sugar in a mixing bowl or spouted glass measuring pitcher, at least two cups – I used a quart one. Nigella recommends a silicone spatula for this rather than a whisk so you don’t introduce too many bubbles into your custard. Certainly worked well for me. When the milk/cream mixture is warm, pour it into the egg, yolks, and sugar mixture and blend well with the spatula. Add the vanilla. Strain the custard into your caramel-lined ramekins.

Cover each ramekin with its own small piece of foil, and place them in the roasting pan.

Place the roasting pan in the oven and pour boiling water in up to a couple of inches up the sides of the ramekins. Push the oven rack in carefully and cook the custards for 25-27 minutes. Carefully remove the foil and cook another 18-20 minutes. They will still be quite jiggly.

Cool to room temperature and then chill the creme caramel for as long as you have – I had 4 hours, which is probably the minimum –  and up to overnight. Unmold and serve. If the creme hasn’t has a really long chill, some of the caramel will still be stuck to the bottom of the ramekin. You can dislodge this with a knife and have some crunchy shards to top your custards as show here.

Cheesy Zucchini Enchiladas

This is more of a formula than a recipe, really. I made these while trying to clear out the fridge before going on vacation, so the filling and sauce are made from what I had. If you have more time, you could use the sauce from this enchilada recipe, or this ranchero sauce would also be good to smother your enchiladas. You could even use canned enchilada sauce. Suggested add-ins for the filling would be corn kernels or black or pinto beans.

Sauce
1 tablespoon olive oil
1 cup cherry or grape tomatoes
1/2 cup chopped onions
1/2 cup diced red bell pepper
1 medium jalapeño, finely diced, seeds removed if you want less heat
1-3 teaspoons medium chili powder
1 teaspoon smoked paprika
salt and freshly ground pepper to taste
2 cups or 1 14-oz. can diced tomatoes
1/2 cup canned tomato sauce
a generous handful, about 1/3 cup chopped cilantro leaves

Filling
1 tablespoon olive oil
two medium zucchini or summer squash or a mix of both, about 3/4 to 1 pound total
salt and freshly ground pepper to taste
2-3 scallions, thinly sliced
3 cups grated cheese, such as a combination of cheddar and pepper jack or mozzarella

4 to 6 8-inch flour tortillas

Make the sauce: Pour the olive oil into a wide deep skillet over medium high heat. Add the cherry tomatoes and cover. Cook, shaking the pan from time to time, for about 5-8 minutes until your hear the tomatoes popping. Lower the heat to reduce spattering, remove the lid, and crush the tomatoes with a potato masher or spoon. Add the onions, increase the heat to medium, and continue cooking until the onions are softened and translucent. Add the red pepper and jalapeño pepper, and the spices and salt and pepper. Mix well. Add the tomatoes and tomato sauce and cook uncovered over medium heat until thickened. Stir in the cilantro and remove from heat.

Make the filling: Add the olive oil to a skillet over medium high heat. Add the zucchini and squash and salt and pepper cook stirring frequently until the squash is starting to brown and soften. Add the scallions, mix in, and remove from the heat.

Assemble the enchiladas: Het your oven to 375°. Heat the tortillas in the microwave, briefly, to make them more pliable (40 seconds in my microwave is about right but microwaves vary greatly). Spread a thin layer of sauce in  a baking dish – 9×9 is about right for 4 enchiladas, and 13×9 should fit 6. Add about 1/3 cup filling to a tortilla, top with about 2 tablespoons of cheese, fold the ends in and roll each enchilada, and place in the dish. Reserve about 3/4 cup cheese for topping. When you have all the enchiladas in the baking dish, cover with more sauce. Bake the enchiladas for 30 minutes, then top with the cheese. Return to the oven just to melt the cheese, about 5 minutes. Remove from the oven and serve with sour cream and salsa, if you like.

Sponge cake with strawberries & cream

This cake recipe comes from Bronwen Wyatt, @bayousaintcake, a terrific baker from New Orleans LA, who can tell you anything you need to know about Mardi Gras King Cakes, biscuits, and really all types of baked goods. It’s an all-purpose sponge cake that can be dressed up any number of ways, with mountains of cream and strawberries, as below, or as the base for a trifle or even tres leches cake. Bronwen makes this cake with olive oil, but I prefer a neutral-flavored oil like safflower. A nut oil like almond or walnut would be delicious if you are not feeding anyone with a nut allergy.

Cake
1/4 cup sugar
15 tablespoons sugar (1/2 cup with 1 tablespoon removed)
3/4 cup all purpose flour
1 teaspoon baking powder
1/2 teaspoon salt
3 tablespoons neutral-flavored oil, such as safflower
1/3 cup milk
1 teaspoon vanilla extract or vanilla bean paste
3 eggs, cold
1/8 teaspoon cream of tarter

Cream
2 cups of heavy cream
2-3 tablespoons powdered sugar
1 teaspoon vanilla

Strawberry filling
2-3 cups of strawberries
1-4 tablespoons sugar
optional: a splash of liqueur, such as Amaretto or lemon juice or Balsamic vinegar

Heat the oven to 350°. If you have an 8- or 9-inch springform pan, that works well for this cake. You don’t need to grease or line it. If you have a cake pan that’s at least 3 inches deep that will work, or a square 9-nch pan that’s deeper.

Separate the eggs, placing the whites in the bowl of a stand mixer or other bowl in which you can whip the whites. Place the yolks in a medium bowl, that will hold abut 2 quarts.

Set the smaller amount of sugar by the whites. Combine the larger amount of sugar with the flour, baking powder, and salt.

Whisk the egg yolks to break them up, then whisk in the oil. Add the milk and the vanilla, and when they’re mixed in, add the flour mixture.

Beat the egg whites and cream of tarter on medium speed till foamy, the start adding the sugar, slowly, continuing to beat until you have shiny but still moist peaks, slowly increasing the speed of your mixer as the sugar is incorporated. The process should take 3-4 minutes.

Mix about 1/3 of the whites into the batter with your whisk, then switch to a spatula, and mix in the rest of the whites in twp additions, trying not to deflate the whites.

Pour the batter into your pan and smooth the top. Bake for 25-30 minutes until the top springs back when pressed lightly and is golden brown. Invert the pan onto a rack as soon as you take it out of the oven. Cool for at least 30 minutes then cut around  the edges with a thin knife and remove the springform sides (if using) and carefully release the cake from the springform bottom. Or unmold the cake if you’re using a different pan.

While the cake is cooling prepare the cream and strawberries. Select a few of the prettiest strawberries to decorate the top pf your cake. Wash (as needed) and hull and slice the rest of the berries. Combine the berries, sugar, and optional flavorings and allow to macerate while the cake cools.

Whip the cream in a chilled bowl with chilled beaters until softly mounded, adding the sugar and vanilla towards the end, when it is near the consistency you like. For longer life, you can also use this whipped cream frosting that is stabilized with cream cheese. It will hold up in the fridge for days without going flat.

To assemble your cake, you can split it, fill it with berries and cream, and then pile more on top. You could also fill the cake with good quality jam, and pile fresh berries on top. Finally, if you aren’t serving a crowd, you can slice wedges of plain cake and cover those with berries and cream, thus reserving the cake for later.

Triple oat pancakes

These pancakes are triple oat because they have oat milk, oat meal – homemade oat flour; rolled oats coarsely ground in a food processor, and rolled oats. They’re a companion to Grancakes. Equally healthy and hearty but they do contain dairy and eggs.

Makes 9-12 large pancakes.

1 ½ cups oat milk
1 tablespoon apple cider vinegar
1 cup oat meal – make the oat meal by grinding the rolled oats in a food processor
½ cup rolled oats
2 large eggs
¼ cup yogurt, your choice of flavor but plain or vanilla recommended
2 tablespoons maple syrup
1 teaspoon vanilla extract
½ cup unbleached flour
1 teaspoon baking powder
½ teaspoon baking soda
a good pinch of kosher salt
butter for frying and serving
maple syrup and fried apples or apple sauce for serving

The night before you want to eat the pancakes, combine the oat milk, apple cider vinegar, oat meal, and rolled oats in a large bowl. Cover and refrigerate overnight.

In the morning add the eggs, yogurt, maple syrup, and vanilla and mix well. Then add the flour, baking powder, baking soda, and salt and mix again. Let the batter sit for 5-10 minutes.

Heat a 9 or 10 inch non-stick and butter lightly. I recommend cooking the pancakes one at a time. When the pan is hot ladle in about 1/4 cup of the batter right in the center and cook until there are a lot of bubbles and the edges look set before flipping. Keep the pancakes warm in a low oven until you have enough for all your guests.

Giant Yeasted Cimmy Roll

Based on King Arthur Baking and Smitten Kitchen recipes, this giant cinnamon roll can be made ahead, and is fun to shape.

Dough
3 ½ cups unbleached or all-purpose flour
2 ½ teaspoons (1 packet) instant yeast
1 teaspoons salt
¼ cup granulated sugar
1 cup milk, whole, 2%, or buttermilk, slightly warmed. I have not experimented with non-dairy milks but expect they would work
2 large eggs, room temperature
8 tablespoons unsalted butter, softened, but OK if it’s still cold, cut into small pieces

Filling
¾ cup packed dark brown sugar
2 tablespoons unbleached or all-purpose flour
1 tablespoon cinnamon
Good pinch salt (or use salted butter)
4 tablespoons unsalted butter, melted
1 tablespoon water
1 teaspoon vanilla

Glaze
1 ¼  cups confectioners’ sugar
½ teaspoon vanilla
2 to 3 tablespoons milk or water

Make the dough:

  • Measure the flour, yeast, salt, and sugar into the bowl of a stand mixer.
  • Beat the eggs and milk together, and make sure the mixture is only lukewarm, then pour into dry ingredients.
  • Using the paddle attachment, mix until there’s almost no dry flour – about 30 seconds – then drop in the butter pieces a few at a time and mix until blended.
    Knead on low-mdium speed for 5 minutes

At this point you have two choices of method:

  • One: Transfer the dough into a plastic container with a lid that holds at least 2 quarts, and refrigerate at least 8 hours and up to two days;
  • Two: Let the dough rise at room temperature until it almost doubles – about 1 ½ to 2 hours. Then, refrigerate the dough for 1 hour.

Assemble the roll:

  • Make the filling: Combine all the filling ingredients either in a bowl, or the pan you used to melt the butter. It will look pretty runny, but will spread just fine on the chilled dough.
  • Line a large baking sheet with parchment. Grease a 10-inch cast iron skillet, cake pan, or spring form pan, and line the bottom with parchment. Place the baking pan on the baking sheet.
  • Remove the chilled dough from the fridge, and place on a lightly floured surface. Divide the dough in half and roll each piece into a 9 x13 inch rectangle. Spread half the filling in one piece of dough, and then stack the second piece on top.
  • Cut the stacked dough into 6 strips, each about 1 ½ inches x 13 inches.
  • Roll up one of the strips and place it in the center of the pan with the spiral up. Wrap another strip around the outside of the first roll, filling side in. Continue with the strip, wrapping the same way. Cut the last 3 strips in half and wrap them around the roll too.

If you did method two, so your dough has only risen about 3 hours, you can cover the roll, refrigerate overnight, and bake in the morning. For method one, let the dough rise at room temperature for about 45 minutes to an hour. Heat the oven to 350° near the end of the rise time.

Bake the roll for 50-55 minutes, covering loosely with foil after about 35 minutes. The internal temperature should be 180° in the center.

Cool the roll in the pan for about 10 minutes, while you mix up the glaze. Transfer the roll to a cutting board or platter, drizzle with the glaze and serve warm or at room temperature.

Summer pasta

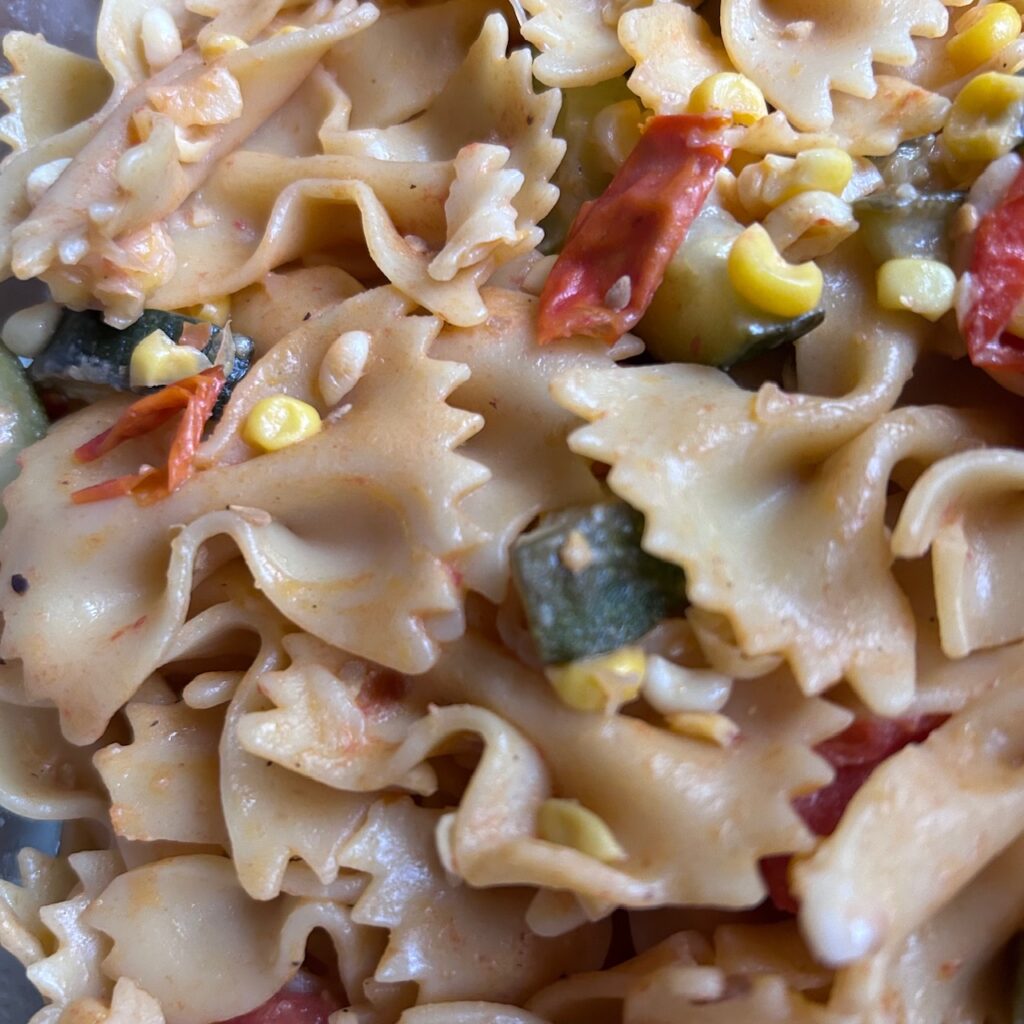
This is the pasta for that time in the summer when you have lots of vegetables – zucchini, tomatoes, corn. You could also sub in other veggies like summer squash, peppers, even broccoli. I tried cooking the pasta in veg broth and am really happy with the results.

Ingredients:

2 cups of well-flavored vegetable or chicken broth – I used veg broth that was made from parsley, tomatoes, mushroom stems, and onions
8-9 ounces your choice of pasta
1 pint of cherry tomatoes or about 2 cups of chopped tomatoes
1 tablespoon butter
1 tablespoon olive oil
1 medium zucchini, cut into quarters long ways and chopped, about 2 cups
1 1/2 cups corn kernels, thawed frozen or cut from about 2 ears of fresh corn
Salt & pepper to taste
A few shakes of red pepper flakes (optional)
2-4 ounces fresh mozzarella ripped into pieces

Pour the vegetable broth into a saucepan that’s at least 4 quarts and has a lid. Add 1/2 cup water and bring to a boil. When it’s boiling add the pasta and about 2 teaspoons salt. Bring to a boil then cover and simmer until the liquid is absorbed and the pasta is al dente, about 15 minutes. You might need to add a bit more water.

Put the olive oil and butter into a wide deep skillet and heat. Add the cherry tomatoes and cover and cook until the tomatoes are softened. If they don’t burst on their own help them along by mashing them with the back of a wooden spoon or potato masher. Add the zucchini and season with salt & pepper and red pepper flakes if using. Stir well and cook until the zucchini is starting to soften. Add the corn. If using frozen you only need to cook it long enough to heat the corn, 2-3 minutes. If using fresh cut off the cob cook a bit longer, 5-10 minutes. By this time the pasta should be done so add it. If it sticks to the bottom of the cooking pot add a few tablespoons of water and cover and let sit a few minutes to loosen. Mix well, then add the mozzarella and toss some more. Taste to make sure it’s seasoned as you like and serve.

Vegetable & [optional] Meat Pot Pie with Yogurt Biscuits

You can make this potpie vegetarian, or add meat – you’ll need 1/2 pound ground meat – beef, turkey, your favorite! The yogurt biscuits make a fluffy and crunchy topping. You can use any combination of root and other vegetables – this version has cabbage and peppers from this week’s box, plus carrots and potatoes from prior weeks. Sub in broccoli and/or cauliflower if you like! Mushrooms are suggested to replace the meat, but are optional.

Take about 1 1/2 hours including baking
Serves 6-8

Filling:
1 tablespoon oil or butter
1/2 pound group meat or mushrooms (optional)
1 tablespoon Worcestershire sauce
1 cup chopped onions
salt and freshly ground pepper
1 1/2 to 2 cups chopped cabbage, or broccoli or cauliflower
3/4 cup chopped bell pepper
2 1/2 to 3 cups root vegetables – carrots, potatoes, turnips, parsnips – peeled and chopped into bite-size pieces
1/2 cup frozen peas, thawed (optional)
2 1/2 to 3 cups liquid – suggested 2 cups veggie or chicken or beef broth, and 1/2 cup whole milk or half & half
1/4 cup flour
1 veggie or meat bouillon cube (optional)

Biscuits:
2 cups unbleached flour
1 tablespoon sugar
1 tablespoon baking powder
1/2 teaspoon baking soda
1 teaspoon fine sea salt
1 stick, 8 tablespoons, cold unsalted butter, cut into bits
1 cup plus 2 tablespoons plain yogurt, cold from the fridge

  1. Make the filling: Melt the butter or add the oil to a large, deep pot and brown the meat or mushrooms, if using. Add the onions and season with salt & pepper. If you’re not using meat or mushrooms, add the oil or butter to the pot and add the onions. Cook until the onions are translucent, about 10 minutes. Add the cabbage or broccoli or cauliflower, and the peppers and continue to cook until all are softened. Add the Worcestershire sauce.
  2. Place the chopped root vegetables in a 2 quart saucepan, and cover with broth, probably 2 cups. Bring to a boil, and simmer, uncovered, until the veggies are fork tender, about 10-15 minutes. Dip the veggies out of the saucepan with a slotted spoon or skimmer, and add them to the large pot with the meat and sauteed vegetables. Keep the remaining broth at a low boil.
  3. Make a slurry with the flour and about 1/3 cup broth and pour it into the saucepan, whisking until thickened. Add the milk or half & half, and continue to whisk.
  4. When the sauce is thick, add it to the large pot and add the peas. Taste for seasoning and add the bouillon cube if it seems bland. Add more broth or half & half if it’s too thick. Turn down the heat and keep the filling warm while you prepare the biscuits.
  5. Heat the oven to 375°. Measure the flour, sugar, baking powder, baking soda, and salt into a mixing bowl. Add the butter bits, and cut into the flour until there are no piece larger than a pea left. Dump in the yogurt and mix with a spatula until there isn’t any dry flour remaining.
  6. Turn the dough out onto a floured surface and knead it briefly until it come together. Pat the dough out into a rough square that’s about 1 inch thick. Fold it into thirds like a letter, and the pat or roll out into a square again. Repeat the folding and rolling 2 more times, finally rolling the dough out to be about 1 inch thick. Transfer the filling into a 2 quart baking dish or really large pie plate. Cut as many 3 inch biscuits as you can – I got 10 – and arrange them on top of the filling. Place the pot pie n the oven and bake for about 30 minutes until the biscuits are brown and the filling is bubbly. Let rest for 10 minutes – or until it stops bubbling furiously – before serving.

Rhubarb scones

This one is taking a lot of tries to get right! I began by trying this Food52 recipe, Naughty Rhubarb Scones. Lots of butter and cream, and they tasted good, but a little too flat.

Next I tried reducing the butter, adding an egg, and using buttermilk instead of heavy cream. That resulted in rhubarb muffin tops, OK but a bit bland.

Next, I tried even less butter, not tossing the rhubarb with sugar before adding it to the scones – on the theory that drew out too much moisture from the rhubarb – and using an egg, plain whole milk yogurt, and a little bit of milk for the liquid. Best of the three, but could maybe still have a little more butter. Or whatever it takes to get a slightly better texture. Maybe more butter and no egg.

So, we’re going with take 3; take 4 updates added. They’re still a bit too cake-y, but taste pretty good! Pic of take 4 below.

1 3/4 cups rhubarb, rinsed, trimmed and cut into 1-inch slices, about 3 stalks
2 1/2 cups unbleached white flour
5 tablespoons sugar
2 teaspoons baking powder
1 teaspoon baking soda
2 good pinches kosher salt
4 6 tablespoons butter
1 large egg 2 egg yolks
2 tablespoons plain whole milk yogurt
1 teaspoon vanilla
3-4 tablespoons whole milk
1 additional tablespoon of sugar for sprinkling, or use coarse sugar

First prep the rhubarb, and set aside.

Combine the flour, 5 tablespoons sugar, baking powder, baking soda, and salt in the bowl of a food processor. Slice in the butter and pulse to combine. Add the rhubarb and pulse 9 times. Transfer the mixture to a bowl. If you don’t have a food processor, combine the dry ingredients in a bowl, and then either cut in or grate the butter. Give the rhubarb and extra chop to get the pieces slightly smaller, then proceed as below.

Place the egg yolks in a spouted measuring cup and add the yogurt and vanilla. Add 3 tablespoons of the milk to get the liquid up to 2/3 1/2 cup. Make a well in the center of the dry ingredients and pour in the liquid. Mix with a fork until the dough starts to come together, then use your hands to combine into a dough, adding the additional tablespoon of milk if there continues to be lots of dry flour around the edges. Turn out on to a lightly floured surface and knead a few times until fairly smooth. Divide the dough in half, and cut each half into 6 wedges. Arrange the wedges on a parchment lined baking sheet and place in the freezer for at least 15 minutes while you heat the oven to 425°. You can also cover the pan and refrigerate the scones overnight.

Sprinkle the chilled scones with sugar and place in the oven. Reduce the heat to 400° and bake for 18-20 minutes until firm and golden brown.

Ranchero Sauce

I love to make this sauce in late summer when tomatoes and peppers are in abundance at local farmers markets. You can freeze it for a taste of summer in winter. Or make it with canned tomatoes in winter! It’s the sauce for chilaquiles and huevos rancheros, but also good on enchiladas, as shown. The sauce can also easily be doubled, just use a bigger pot. I like to make this sauce with veggie broth so that it’s all purpose – but feel free to sub chicken broth if there are no vegetarians to be fed at your table.

With a hat tip to Chile Pepper Madness for the inspiration!

1-2 tablespoons vegetable oil
1 1/2 cups chopped onion
1 bell pepper or 1-2 poblano peppers, chopped (about 1 cup)
3-4 cloves garlic, minced or put through a press
2 tablespoons ground ancho chile powder
1 tablespoon hot or mild chile powder (I like Penzey’s)
1 teaspoon dried oregano, preferably Mexican
1 teaspoon ground cumin
2 cups plum tomatoes, peeled and diced OR one 14-oz. can of diced tomatoes OR whole tomatoes
1 cup vegetable broth
(optional) 2 teaspoons to 1 tablespoon brown sugar (good with canned tomatoes)
¼ cup chopped cilantro
Salt and freshly ground pepper to taste
(optional) juice of 1 lime (2-3 tablespoons)

  1. Pour the vegetable oil into a deep pot that’s at least 2 quarts, and heat over medium-high. Add the onion and chopped peppers and cook for about 5 minutes until starting to soften. Add the garlic, and cook a few more minutes until fragrant. Add the ground spices and oregano, and if the pan seems dry, add the last tablespoon of oil.
  2. Add the tomatoes and vegetable broth, and brown sugar if using. Bring to a boil, then turn the heat down and let the sauce simmer gently for about 20 minutes. It should thicken nicely. Puree the sauce with an immersion blender or in the food processor. When it’s smooth add the cilantro and lime juice if using.
  3. Use right away or cool and store in a container (preferably glass) in the fridge for up to week. Freeze for longer storage.

[Extra] recipe-a-month for May 2024